
一、简介
正常情况下我们开发的时候都是使用一个数据源,但是由于有些项目同步数据的时候不想造成数据库iO消耗压力过大,便会一个项目对应多个数据源,但是我们如何配置多个数据源呢?今天我们使用Springboot中为了解决多数据源而创建的启动器:dynamic-datasource-spring-boot-starter,这是一个基于SpringBoot快速集成多数据源的启动器。
二、项目集成
1.引入依赖
<!--配置多数据源-->
        <dependency>
            <groupId>com.baomidou</groupId>
            <artifactId>dynamic-datasource-spring-boot-starter</artifactId>
            <version>3.6.1</version>
        </dependency>
完整的pom文件如下所示:
<?xml version="1.0" encoding="UTF-8"?>
<project xmlns="http://maven.apache.org/POM/4.0.0" xmlns:xsi="http://www.w3.org/2001/XMLSchema-instance"
         xsi:schemaLocation="http://maven.apache.org/POM/4.0.0 https://maven.apache.org/xsd/maven-4.0.0.xsd">
    <modelVersion>4.0.0</modelVersion>
    <parent>
        <groupId>org.springframework.boot</groupId>
        <artifactId>spring-boot-starter-parent</artifactId>
        <version>2.5.4</version>
        <relativePath/> <!-- lookup parent from repository -->
    </parent>
    <groupId>com.example</groupId>
    <artifactId>HelloDemo</artifactId>
    <version>0.0.1-SNAPSHOT</version>
    <name>HelloDemo</name>
    <description>HelloDemo</description>
    <properties>
        <java.version>8</java.version>
    </properties>
    <dependencies>
        <dependency>
            <groupId>org.springframework.boot</groupId>
            <artifactId>spring-boot-starter-web</artifactId>
        </dependency>
        <dependency>
            <groupId>org.mybatis.spring.boot</groupId>
            <artifactId>mybatis-spring-boot-starter</artifactId>
            <version>2.2.2</version>
        </dependency>
        <!--配置多数据源-->
        <dependency>
            <groupId>com.baomidou</groupId>
            <artifactId>dynamic-datasource-spring-boot-starter</artifactId>
            <version>3.6.1</version>
        </dependency>
        <dependency>
            <groupId>org.springframework.boot</groupId>
            <artifactId>spring-boot-starter-jdbc</artifactId>
        </dependency>
        <dependency>
            <groupId>org.projectlombok</groupId>
            <artifactId>lombok</artifactId>
        </dependency>
        <dependency>
            <groupId>mysql</groupId>
            <artifactId>mysql-connector-java</artifactId>
            <version>8.0.31</version>
        </dependency>
        <dependency>
            <groupId>com.alibaba</groupId>
            <artifactId>druid-spring-boot-starter</artifactId>
            <version>1.2.16</version>
        </dependency>
        <dependency>
            <groupId>org.springframework.boot</groupId>
            <artifactId>spring-boot-starter-quartz</artifactId>
        </dependency>
        <dependency>
            <groupId>org.apache.commons</groupId>
            <artifactId>commons-lang3</artifactId>
        </dependency>
        <dependency>
            <groupId>org.springframework.boot</groupId>
            <artifactId>spring-boot-starter-test</artifactId>
            <scope>test</scope>
        </dependency>
    </dependencies>

    <build>
        <plugins>
            <plugin>
                <groupId>org.springframework.boot</groupId>
                <artifactId>spring-boot-maven-plugin</artifactId>
                <configuration>
                    <image>
                        <builder>paketobuildpacks/builder-jammy-base:latest</builder>
                    </image>
                </configuration>
            </plugin>
        </plugins>
    </build>

</project>
2.配置多数据源
我们配置两个数据源master和slave1。
#设置默认的数据源
spring.datasource.dynamic.primary=master
#严格匹配数据源 默认为false  true未匹配到指定的数据源时会抛出异常
spring.datasource.dynamic.strict=false
#主数据源配置
spring.datasource.dynamic.datasource.master.driver-class-name=com.mysql.cj.jdbc.Driver
spring.datasource.dynamic.datasource.master.username=root
spring.datasource.dynamic.datasource.master.password=123456
spring.datasource.dynamic.datasource.master.url=jdbc:mysql://127.0.0.1:3306/shop?useUnicode=true&characterEncoding=UTF8&rewriteBatchedStatements=true&serverTimezone=PRC&useSSL=false&allowMultiQueries=true

#从数据源配置
spring.datasource.dynamic.datasource.slave1.driver-class-name=com.mysql.cj.jdbc.Driver
spring.datasource.dynamic.datasource.slave1.username=root
spring.datasource.dynamic.datasource.slave1.password=123456
spring.datasource.dynamic.datasource.slave1.url=jdbc:mysql://127.0.0.1:3306/shop1?useUnicode=true&characterEncoding=UTF8&rewriteBatchedStatements=true&serverTimezone=PRC&useSSL=false&allowMultiQueries=true
3.创建实体
package com.example.hellodemo.bean.one;

import lombok.Data;


/**
 * @author qx
 * @date 2023/11/27
 * @des
 */
@Data
public class DbOneEntity {

    private Long id;

    private String name;

}
package com.example.hellodemo.bean.two;
import com.baomidou.dynamic.datasource.annotation.DS;
import lombok.Data;
/**
* @author qx
* @date 2023/11/27
* @des
*/
@Data
public class DbTwoEntity {
private Long id;
private String name;
}4.创建数据持久层
package com.example.hellodemo.repository;

import com.example.hellodemo.bean.one.DbOneEntity;
import org.apache.ibatis.annotations.Mapper;
import org.apache.ibatis.annotations.Select;
import org.springframework.context.annotation.ComponentScan;
import org.springframework.stereotype.Component;
import org.springframework.stereotype.Repository;

import java.util.List;

/**
 * @author qx
 * @date 2023/11/27
 * @des
 */
@Mapper
public interface DbOneRepository {

    @Select("select * from t_db1")
    List<DbOneEntity> findAll();
}
package com.example.hellodemo.repository;
import com.example.hellodemo.bean.two.DbTwoEntity;
import org.apache.ibatis.annotations.Mapper;
import org.apache.ibatis.annotations.Select;
import java.util.List;
/**
* @author qx
* @date 2023/11/27
* @des
*/
@Mapper
public interface DbTwoRepository {
@Select("select * from t_db2")
List<DbTwoEntity> findAll();
}5.编写服务层
package com.example.hellodemo.service;

import com.baomidou.dynamic.datasource.annotation.DS;
import com.example.hellodemo.bean.one.DbOneEntity;
import com.example.hellodemo.bean.two.DbTwoEntity;
import com.example.hellodemo.repository.DbOneRepository;
import com.example.hellodemo.repository.DbTwoRepository;
import org.springframework.beans.factory.annotation.Autowired;
import org.springframework.stereotype.Service;

import java.util.List;

/**
 * @author qx
 * @date 2023/11/27
 * @des 服务层
 */
@Service
public class DbService {

    @Autowired
    private DbOneRepository dbOneRepository;

    @Autowired
    private DbTwoRepository dbTwoRepository;

    // 指定使用master数据源
    @DS("master")
    public List<DbOneEntity> queryOneList() {
        return dbOneRepository.findAll();
    }

    // 指定使用slave_1数据源
    @DS("slave1")
    public List<DbTwoEntity> queryTwoList() {
        return dbTwoRepository.findAll();
    }
}
6.编写控制层
package com.example.hellodemo.controller;

import com.example.hellodemo.bean.one.DbOneEntity;
import com.example.hellodemo.bean.two.DbTwoEntity;
import com.example.hellodemo.service.DbService;
import org.springframework.beans.factory.annotation.Autowired;
import org.springframework.web.bind.annotation.GetMapping;
import org.springframework.web.bind.annotation.RestController;

import java.util.List;

/**
 * @author qx
 * @date 2023/11/27
 * @des
 */
@RestController
public class DbController {

    @Autowired
    private DbService dbService;

    @GetMapping("/queryOne")
    public List<DbOneEntity> queryOne() {
        return dbService.queryOneList();
    }

    @GetMapping("/queryTwo")
    public List<DbTwoEntity> queryTwo() {
        return dbService.queryTwoList();
    }

}
三、测试
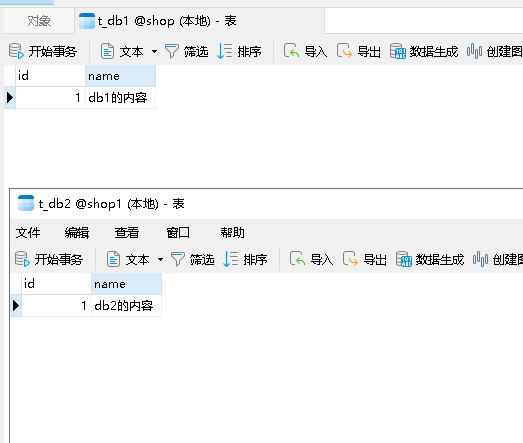
设置两个数据库中数据表的初始数据。
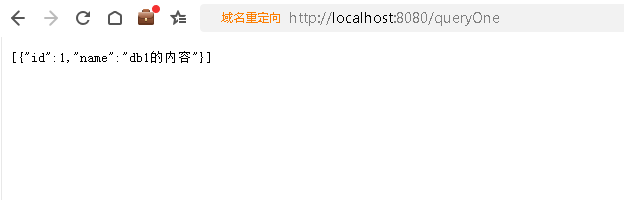
测试db1数据库的数据
测试db2数据库的数据
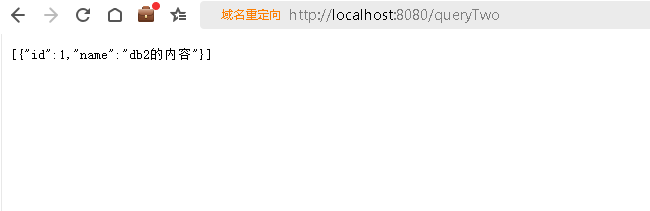
这样我们就实现了多数据源的操作。