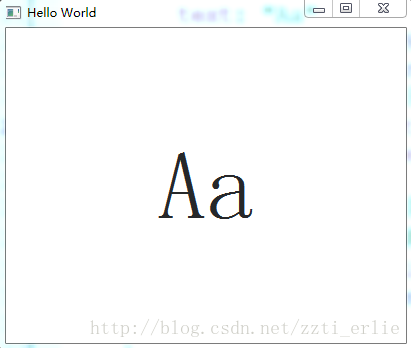
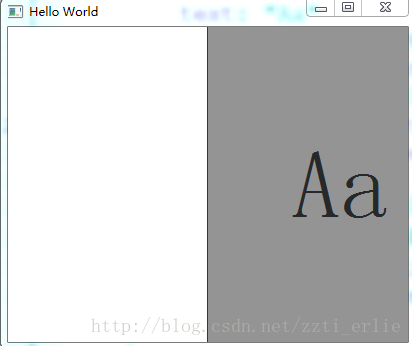
Drawer(抽屉)
import QtQuick 2.7
import QtQuick.Controls 2.0
import QtQuick.Layouts 1.0

ApplicationWindow {
    id: window
    visible: true
    width: 640
    height: 480
    title: qsTr("Hello World")

    Drawer {
        id: drawer
        width: 0.5 * window.width
        height: window.height
    }

    Label {
        id: content

        text: "Aa"
        font.pixelSize: 96
        anchors.fill: parent
        //从Text上继承下来的属性,使Label中文字水平和垂直居中,Label换成Text也行
        verticalAlignment: Label.AlignVCenter
        horizontalAlignment: Label.AlignHCenter

        //从Item继承下来的属性,保存转化属性,
        //这部分的内容实时调整Label的坐标,不然Label中的字在拖动Drawer时不会动
        transform: Translate {
            x: drawer.position * content.width * 0.33
Component
是一个组件类供引用,一个QML文件本质上也是一个组件
import QtQuick 2.7
import QtQuick.Controls 2.0
import QtQuick.Layouts 1.0

ApplicationWindow {
    id:200
    height: 200
    title: qsTr("Hello World")

    Item {
        width: 100; height:100

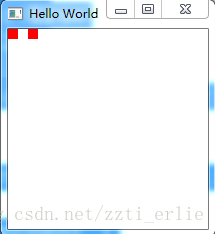
        Component {
            id: redSquare

            Rectangle {
                color: "red"
                width: 10
                height: 10}
        }

        Loader { sourceComponent: redSquare }
        Loader { sourceComponent: redSquare; x:20}
    }

}
QtObject
提供轻量级的用户自定义属性集合
Binding(绑定)
将一个对象的属性绑定到另一个不是由QML直接实例化的对象上,如由C++导出到QML中的类
Loader(加载程序)
动态加载QML组件
main.qml
import QtQuick 2.7
import QtQuick.Controls 2.0
import QtQuick.Layouts 1.0

ApplicationWindow {
    id:200
    height: 200
    title: qsTr("Hello World")

    Item {
        width: 200
        height: 200
        Loader {
           id: pageLoader
           width: 200
           height: 100}

        MouseArea {
            anchors.fill:"Page1.qml"}
    }
}
Page1.qml
import QtQuick 2.0

Rectangle {
    border.width:1}
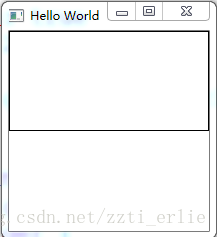
点击控件后加载Page1.qml文件
Connection(连接)
在QML传递事件时通常只要创建一个on即可,如下点击鼠标改变背景颜色
import QtQuick 2.7
import QtQuick.Controls 2.0
import QtQuick.Layouts 1.0

ApplicationWindow {
    id: window
    visible: true
    width: 200
    height: 200
    title: qsTr("Hello World")

    Rectangle {
        id: rec
        anchors.fill: parent
        color: "red"
        MouseArea {
            anchors.fill: parent
            onClicked: {
               rec.color = "black"
Connection适用以下情况
Multiple connections to the same signal are required
Creating connections outside the scope of the signal sender
Connecting to targets not defined in QML
如我点击按钮改变Rectangle的颜色
import QtQuick 2.7
import QtQuick.Controls 2.0
import QtQuick.Layouts 1.0

ApplicationWindow {
    id:200
    height: 200
    title: qsTr("Hello World")

    Rectangle {
        id: rec
        anchors.fill: parent
        color: "red"

        Button {
            id: button
            anchors.bottom: rec.bottom
            text: "按钮"
            width: 200
            height: 50}
    }

    Connections {
        //发出信号的对象
        target: button;
        onClicked :"black"}
    }
}
Timer(计时器)
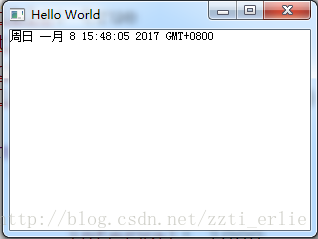
定时器,下面是一个实时显示时间的应用
import QtQuick 2.7
import QtQuick.Controls 2.0
import QtQuick.Layouts 1.0

ApplicationWindow {
    id: window
    visible: true
    width: 300
    height: 200
    title: qsTr("Hello World")

    Item {
        Timer {
            //设置触发时间
            interval: 1000
            //是否启用定时器,对于一个不重复的定时器触发后设置为false
            running: true
            //是否重复
            repeat: true
            //使用JavaScript的Date()对象来访问当前时间
            onTriggered: time.text = Date().toString()
        }

        Text { id: time
SwipeView
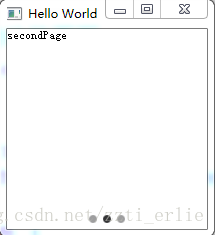
显示当前页是第几页的控件
import QtQuick 2.7
import QtQuick.Controls 2.0
import QtQuick.Layouts 1.0

ApplicationWindow {
    visible:640
    height: 480
    title: qsTr("Hello World")

    //一个滑动的页面
    SwipeView {
        id: view

        currentIndex: 1
        anchors.fill: parent

        Item {
            id: firstPage
            Text {
                text: qsTr("firstPage")}
        }
        Item {
            id:qsTr("secondPage")}
        }
        Item {
            id:qsTr("thirdPage")}
        }
    }

    PageIndicator {
        id: indicator
        //保存页面的个数
        count: view.count
        currentIndex: view.currentIndex

        anchors.bottom: view.bottom
        anchors.horizontalCenter: parent.horizontalCenter
    }
}
Repeator(重复者)
重复排列某一个控件,如下面一行排列3个一样的Rectangle,如要编程列,把Row变成Column即可
import QtQuick 2.7
import QtQuick.Controls 2.0
import QtQuick.Layouts 1.0

ApplicationWindow {
    visible:640
    height: 480
    title: qsTr("Hello World")

    Row {
        Repeater {
            model: 3
            Rectangle {
                width: 100; height:40
                border.width: 1
                color: "yellow"}
        }
    }
}
Flickable
里面的控件可以拖动
Canvas(画布)
import QtQuick 2.7
import QtQuick.Controls 2.0
import QtQuick.Layouts 1.0

ApplicationWindow {
    visible: true
    width: 640
    height: 480
    title: qsTr("Hello World")

    Canvas {
        width: 400
        height: 200
        onPaint: {
            //得到画师ctx是一个Context2d对象
            var ctx = getContext("2d");
            //设置画笔的宽度
            ctx.lineWidth = 2;
            //设置画笔的颜色
            ctx.strokeStyle = "red";
            //设置画刷的颜色
            ctx.fillStyle = "blue";
            ctx.beginPath();
            //a rectangle at  (x, y), with the given width w and height h
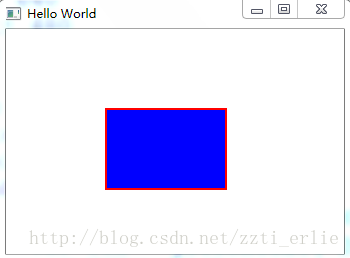
            ctx.rect(100,80,120,80);
            ctx.fill();
            ctx.stroke();
        }
    }

}
用JavaScript动态构建QML对象
动态创建组件
点击main.qml上的按钮,将窗口上的内容变为SecondPage.qml上的内容
main.qml
import QtQuick 2.7
import QtQuick.Controls 2.0
import QtQuick.Layouts 1.0
import "MyJs.js" as My

ApplicationWindow {
    id:640
    height: 480
    title: qsTr("Hello World")

    Button {
        text: "Button"
        onClicked: {
            My.createSecondPage();
        }
SecondPage.qml
import QtQuick 2.7
import QtQuick.Controls 2.0
import QtQuick.Layouts 1.0


Rectangle {
    width: 640
    height: 480

    Text {
        anchors.fill: parent
        text: "Second Page"
MyJs.js
function createSecondPage()
    var component = Qt.createComponent("SecondPage.qml");
    //必须指定父类对象不然不会显示
    var
动态删除对象
main.qml
控件显示5个红色的正方形,显示完直接销毁
import QtQuick 2.7
import QtQuick.Controls 2.0
import QtQuick.Layouts 1.0

ApplicationWindow {
    id: app
    visible: true
    width: 640
    height: 480
    title: qsTr("Hello World")

    Item {
        id: container
        width: 500; height: 100

        Component.onCompleted: {
            var component = Qt.createComponent("SecondPage.qml");
            for (var i=0; i<5; i++) {
                var object = component.createObject(container);
                object.x = (object.width + 10) * i;
            }
        }
    }
}
SecondPage.qml
import QtQuick 2.7

Rectangle {
    id:80; height:80
    color: "red"

    NumberAnimation on opacity {
        to: 0
        duration: 1000

        onRunningChanged: {
            if (!running) {
                console.log("Destroying...")
                rect.destroy();
            }


