
==回顾:== 上篇文章我们成功测试了用户邮箱开通和配置,测试了邮件的收发都正常,我们没有测试Outlook 网页版也就是OWA, 今天我们要做的就是配置域环境下的ADFS联合身份验证,以实现OWA 和 ECP 的单点登录,什么是单点登录,相关知识可自行搜索。本章实际操作,我们将ADFS角色安装在我们的CA服务器上。
安装ADCS和ADFS并配置ADCS和ADFS
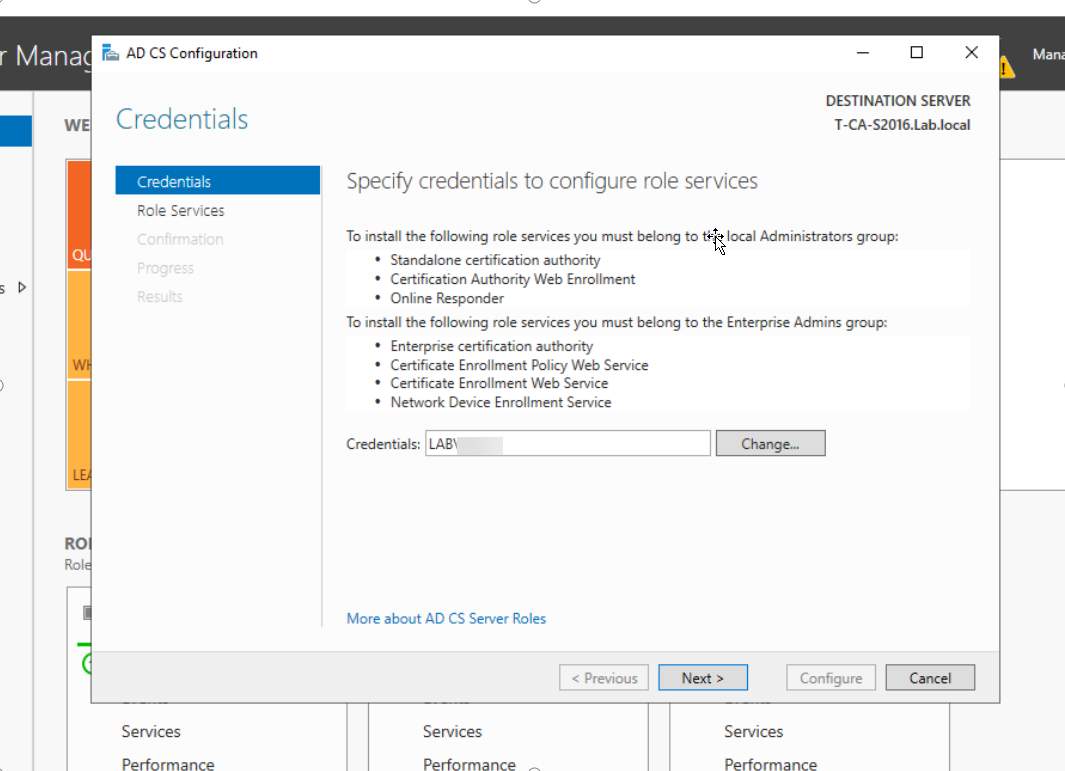
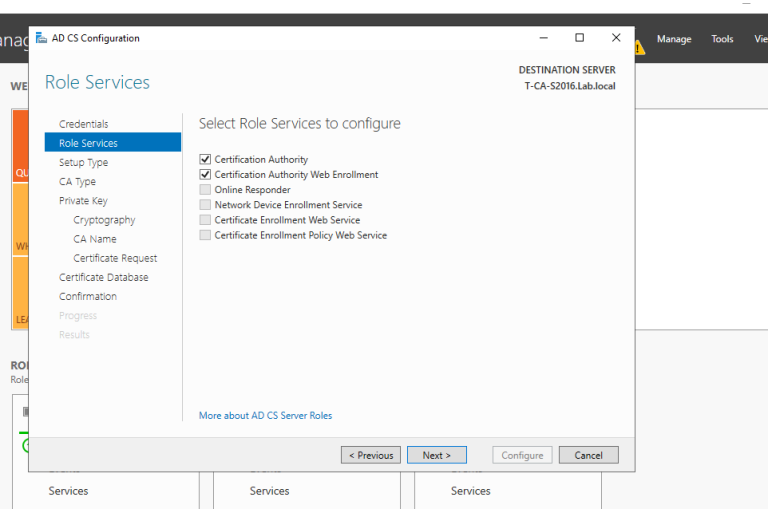
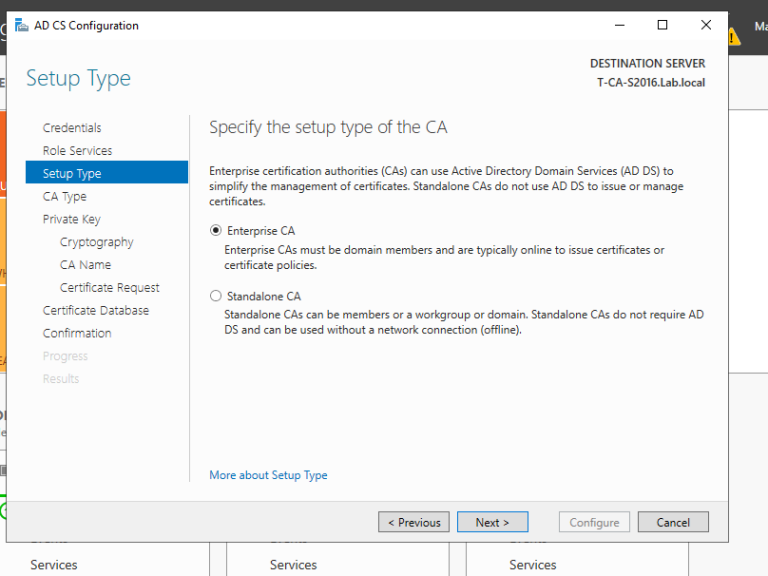
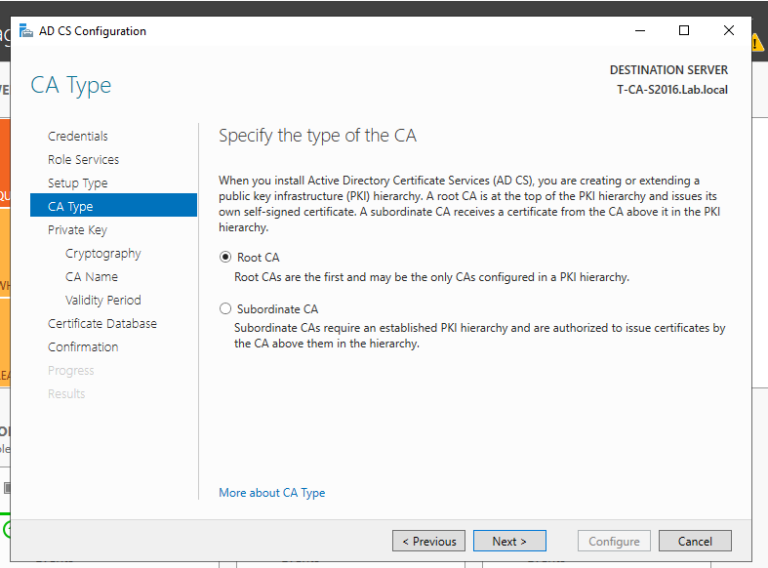
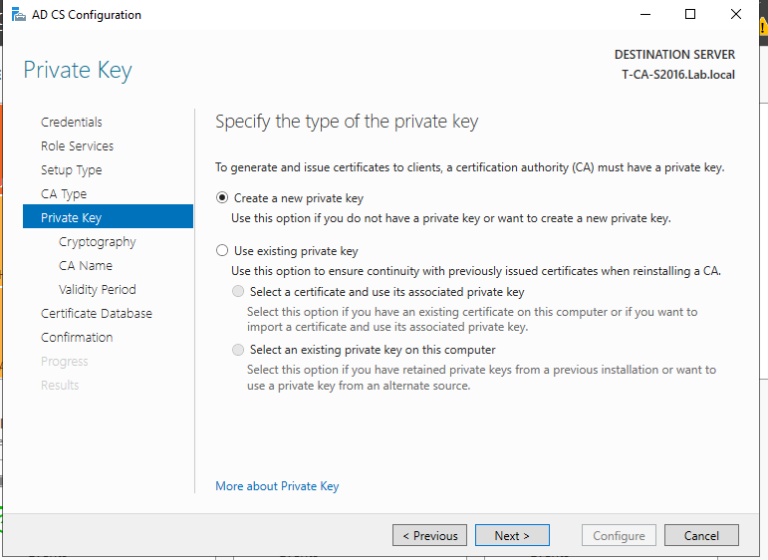
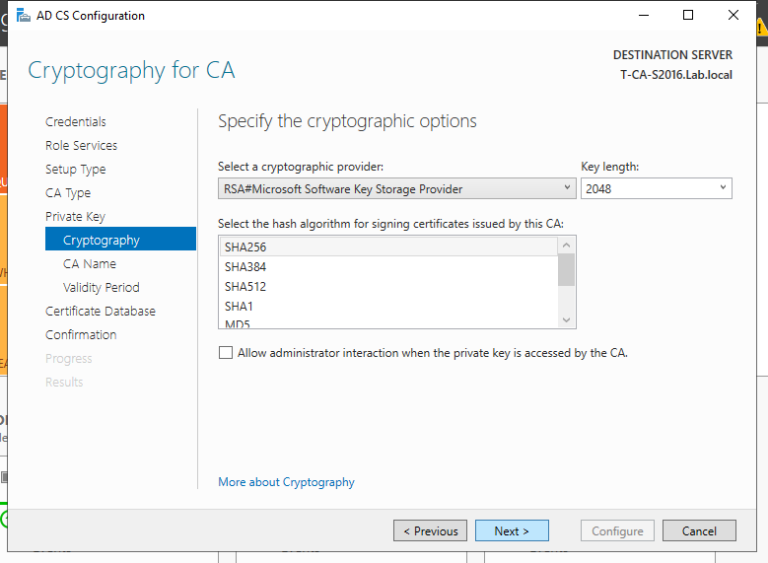
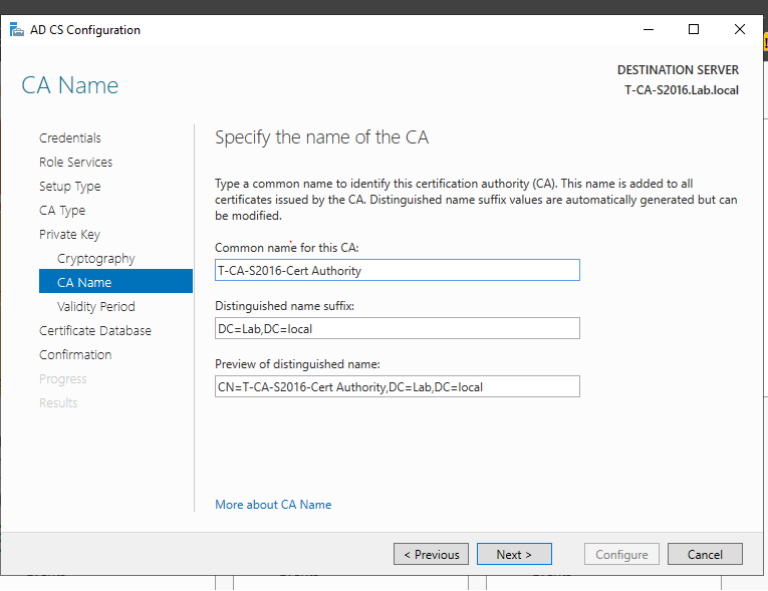
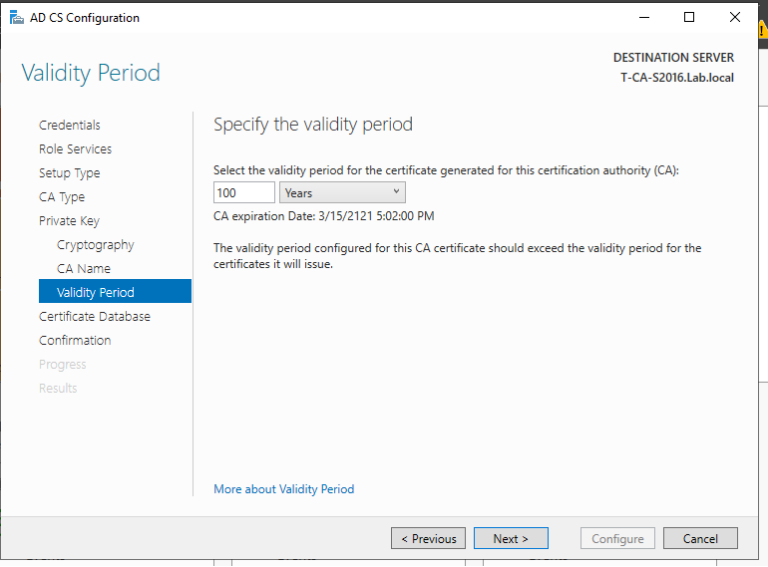
1. 域管理员账号登录CA服务器T-CA-S2016,安装ADCS并完成配置,这里我们已经通过Add roles and feature把ADCS安装好了,接下来配置,上图:
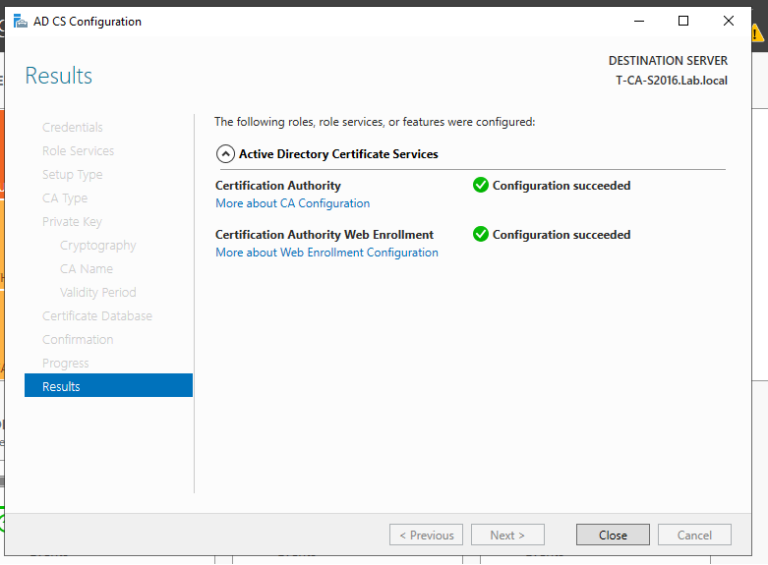
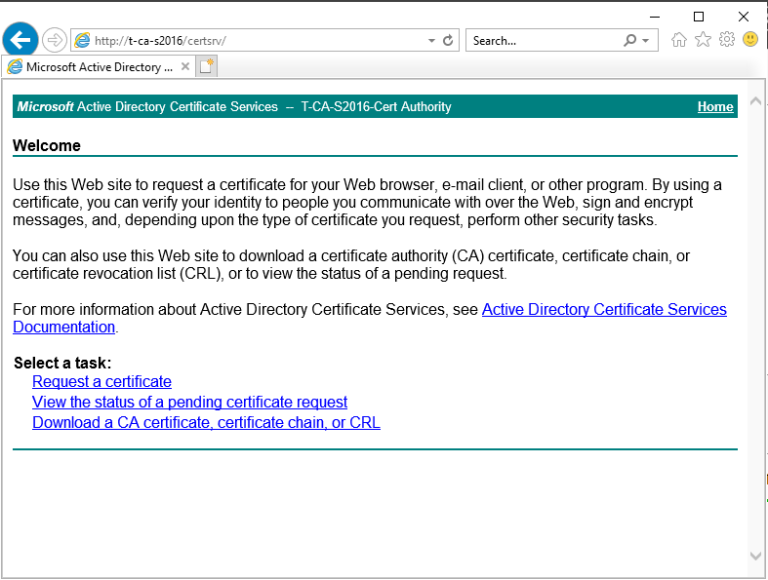
2. 至此我们完成了ADCS的配置,我们来打开浏览器来检查证书申请页面是否可以正常访问,出现如下页面说明ADCS配置正确,证书服务配置没有问题。
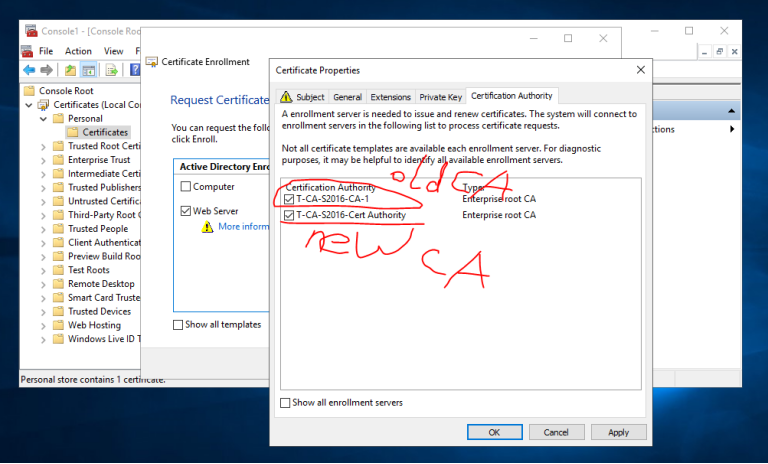
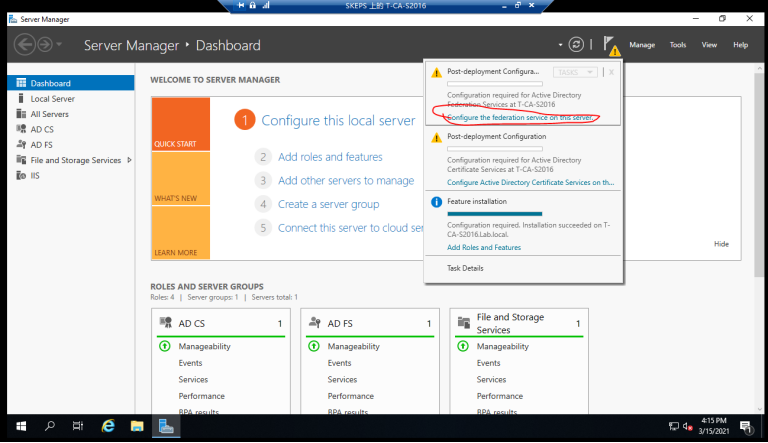
3. 域管理员账号登录CA服务器T-CA-S2016,安装ADFS并完成配置, 在配置ADFS服务之前,我们必须为ADFS服务器T-CA-S2016申请计算机证书
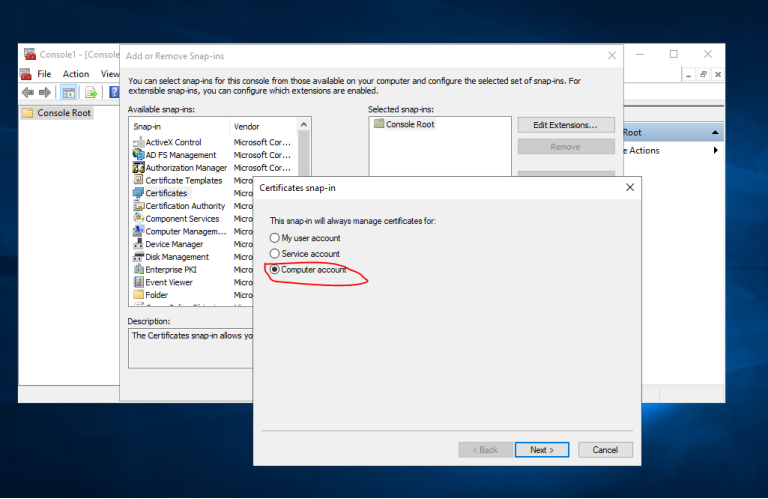
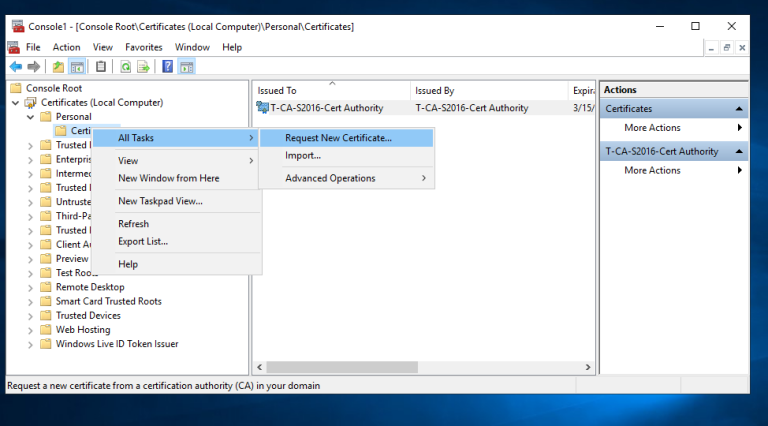
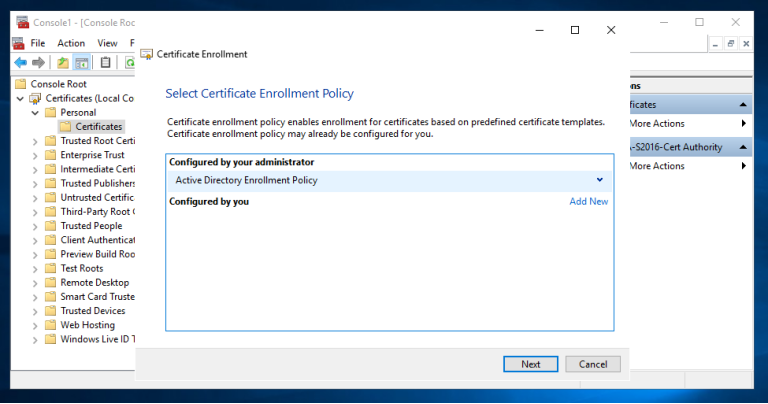
3.1 登录到CA服务器T-CA-S2016,打开MMC和证书管理单元,选择计算机帐户,如图按步骤申请证书即可

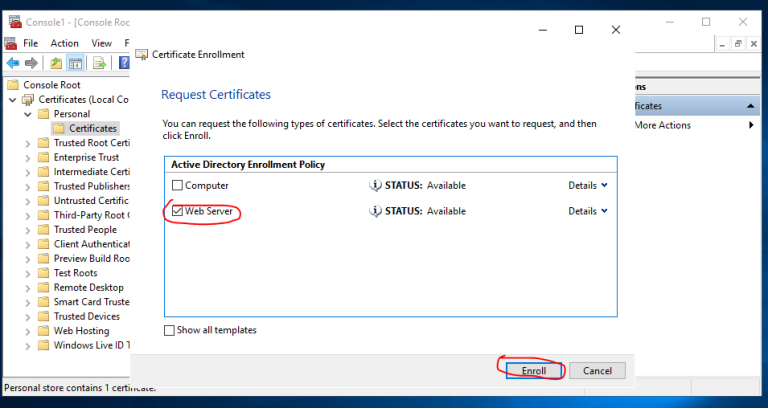
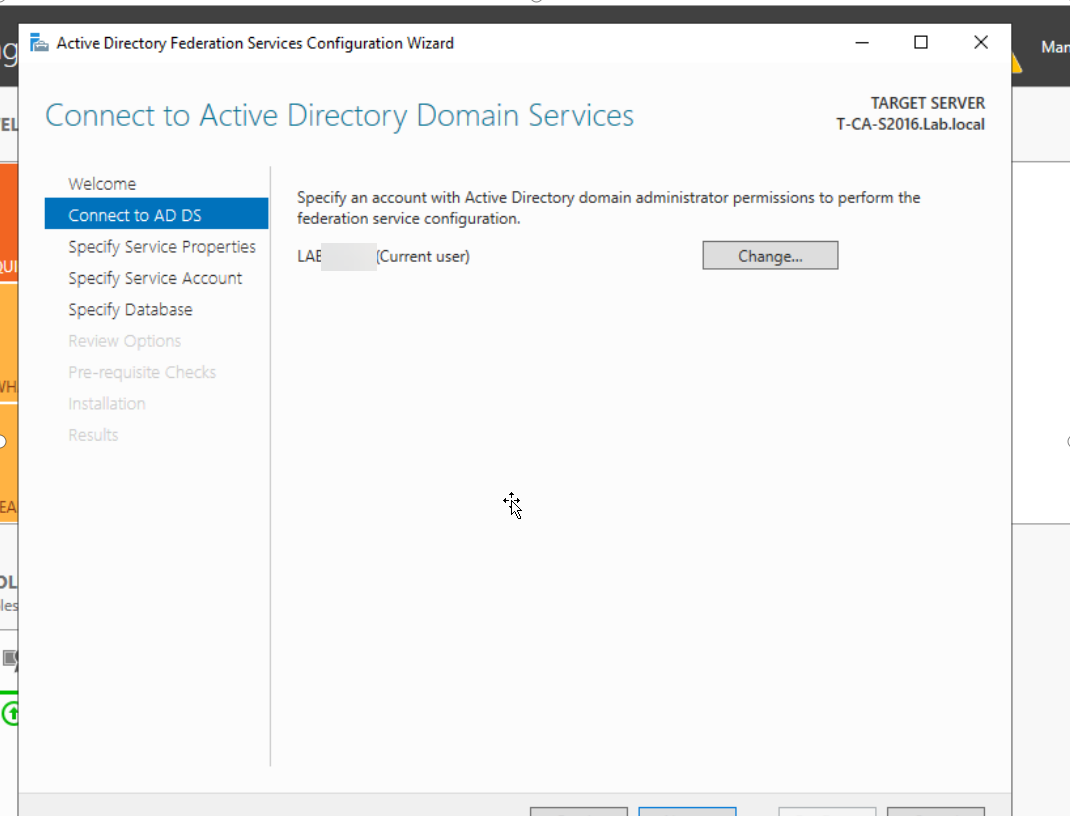
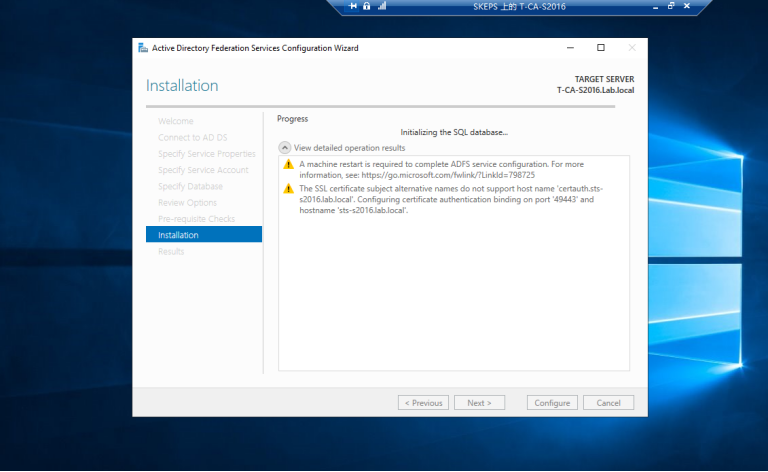
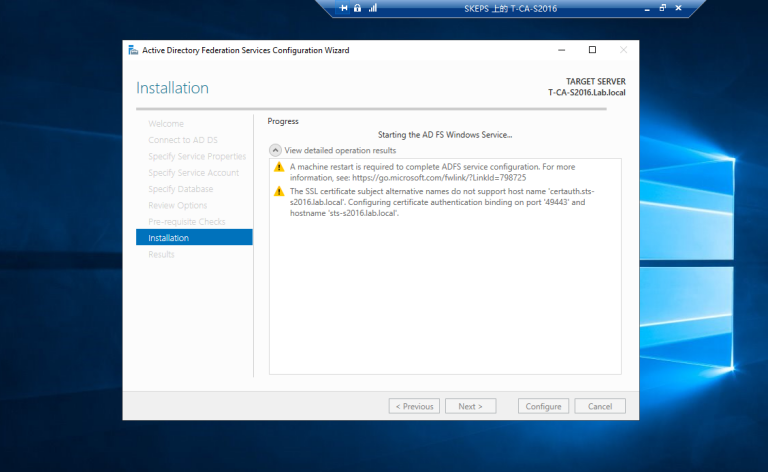
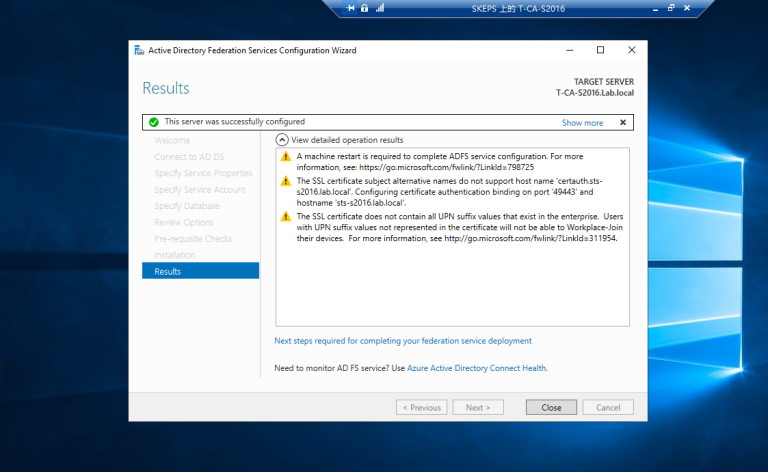
3.2 配置ADFS服务
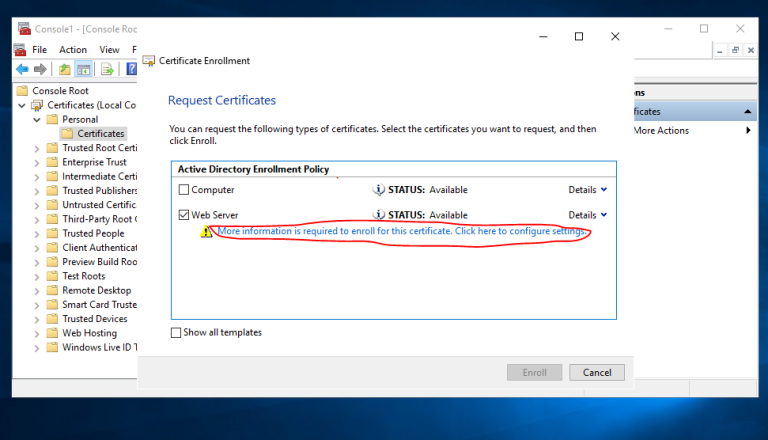
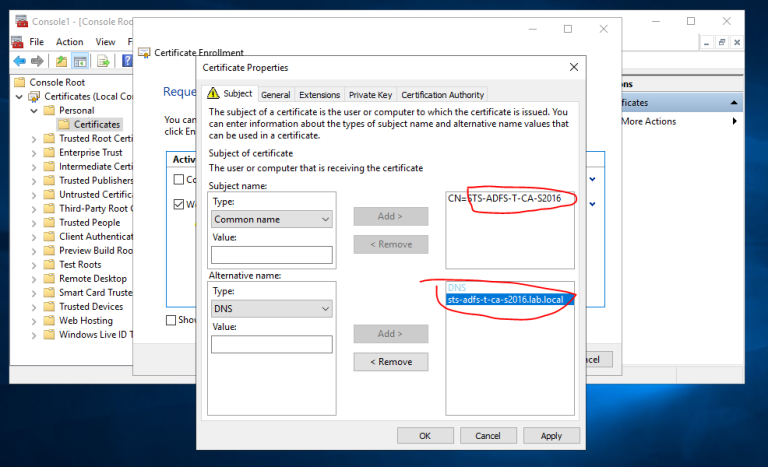
 ==看到下拉列表中没有证书可以选择==
 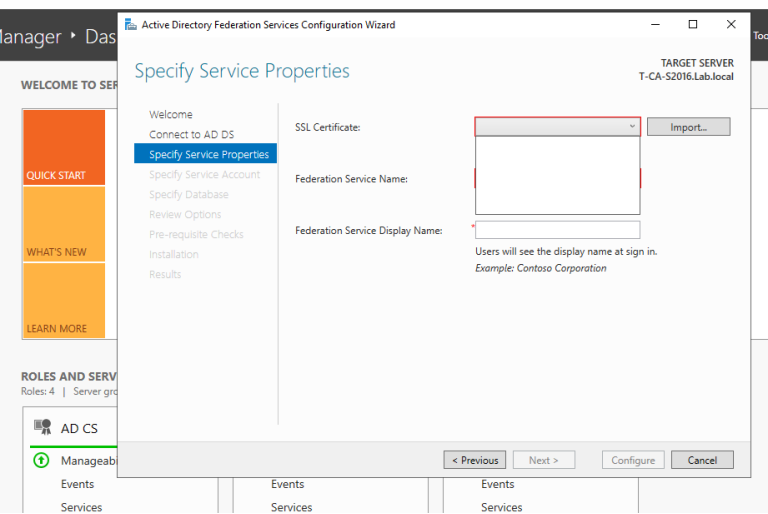 ==我们再次请求一个新的证书,这次公共名称和DNS名称都必须有域后缀==
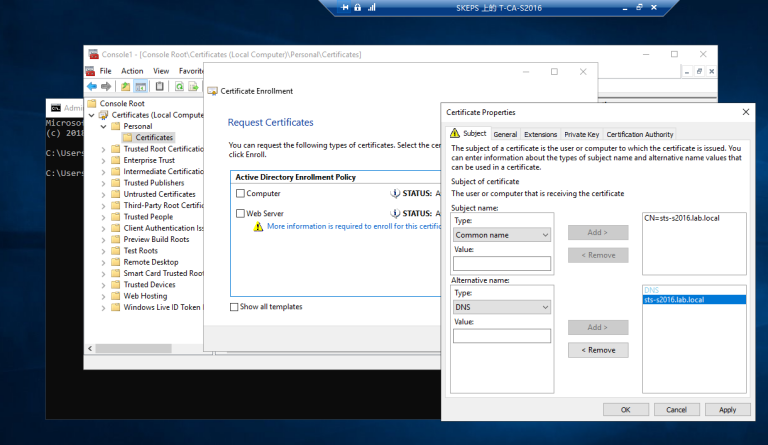
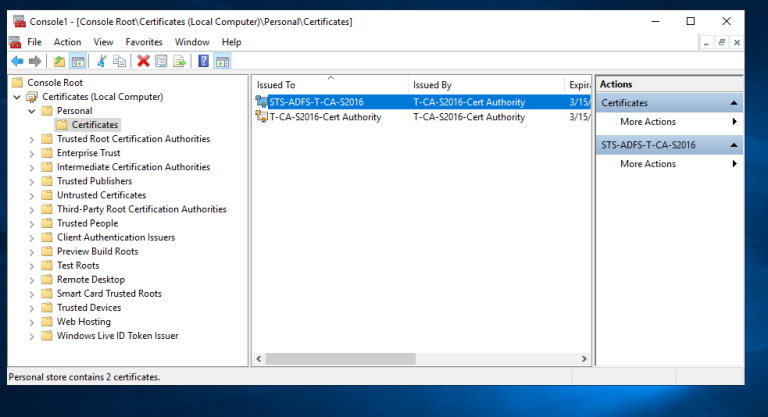
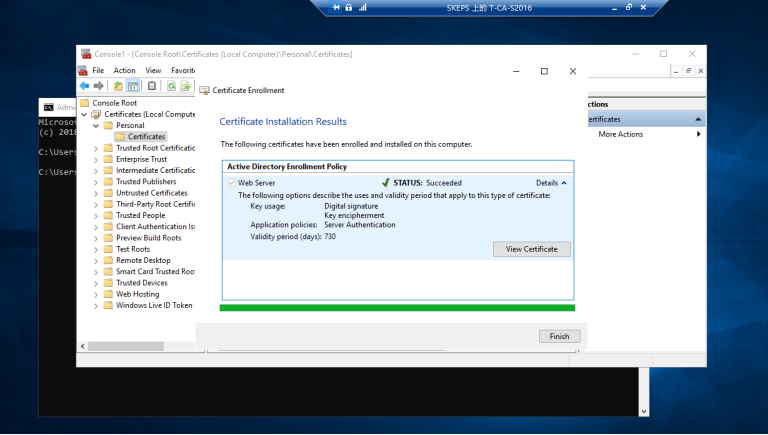 ==我们可以看到,我们有一个本地的个人计算机证书==
 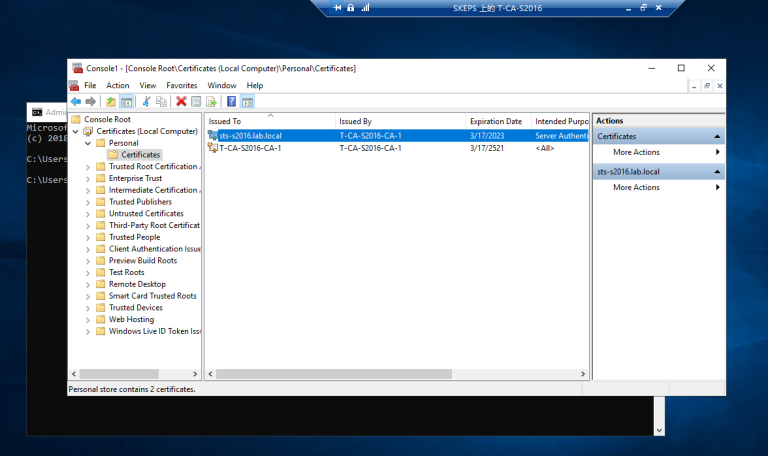 ==现在我们可以从下拉列表中看到证书==
 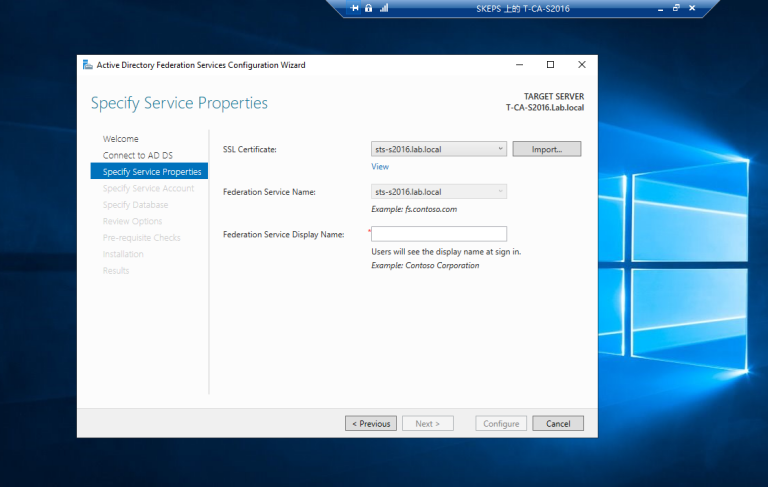 ==选择我们使用默认pwd之前创建的服务帐户==
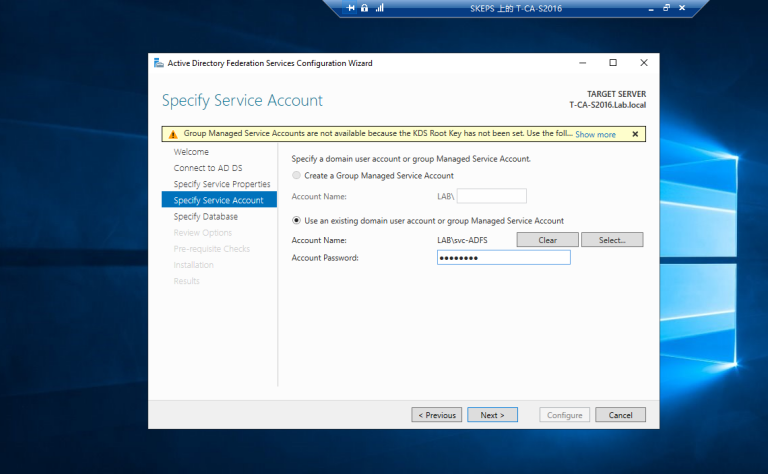
3.3 运行PS脚本Add-RelyingPartyTrust.ps1 以添加Exchagne 服务器为ADFS服务器的信赖方,如下图
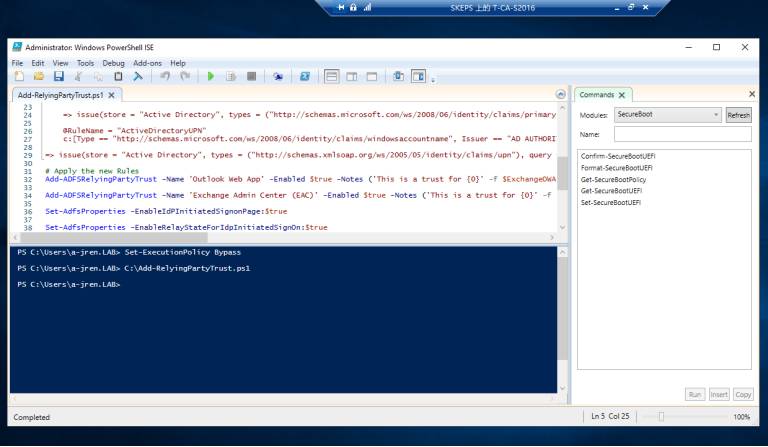 ==脚本成功运行之后会在ADFS中看到如下界面==
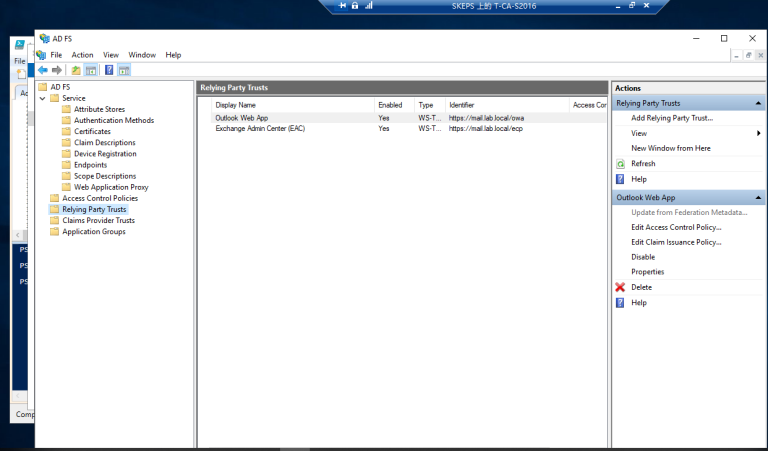
3.4 启用idp初始化signon页
https://sts-s2016.lab.local/adfs/ls/idpinitiatedsignon.aspx 请注意,sts-s2016.lab.local 就是我们向CA之前请求证书时的公共名称和DNS名称 ==需要运行的PowerShell命令:== ==Set-ADFSProperties -EnableIdpInitiatedSignOnPage:$true== ==Set-ADFSProperties -EnableRelayStateForIdpInitiatedSignOn:$true==
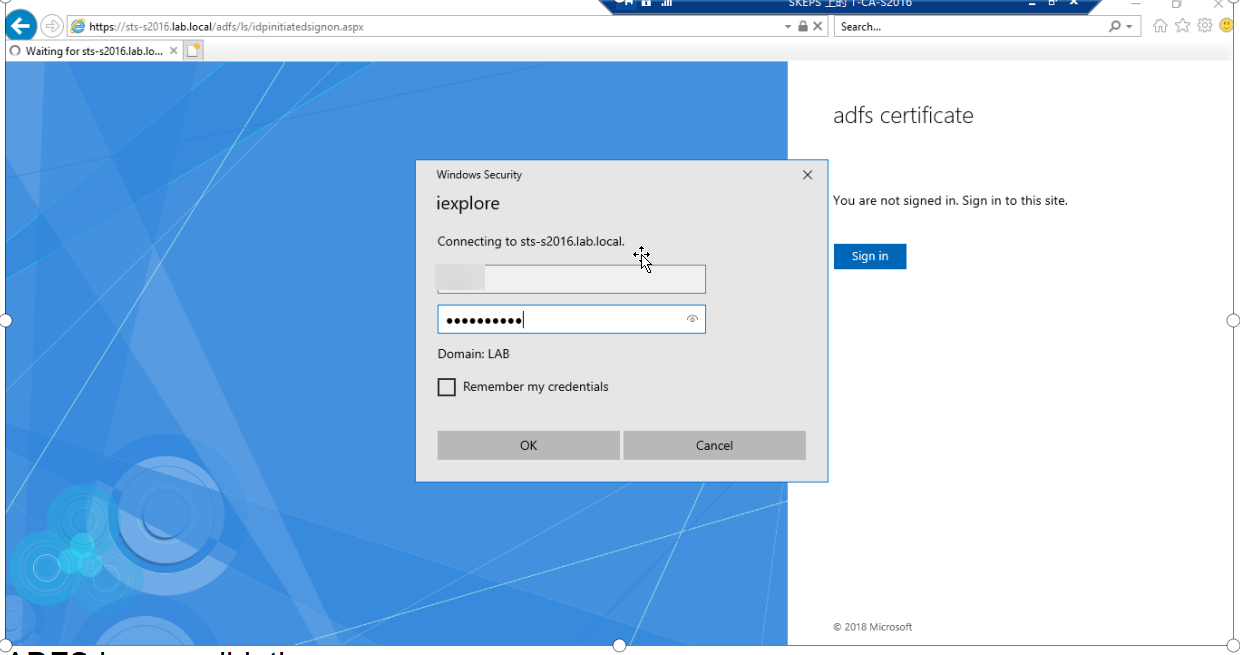
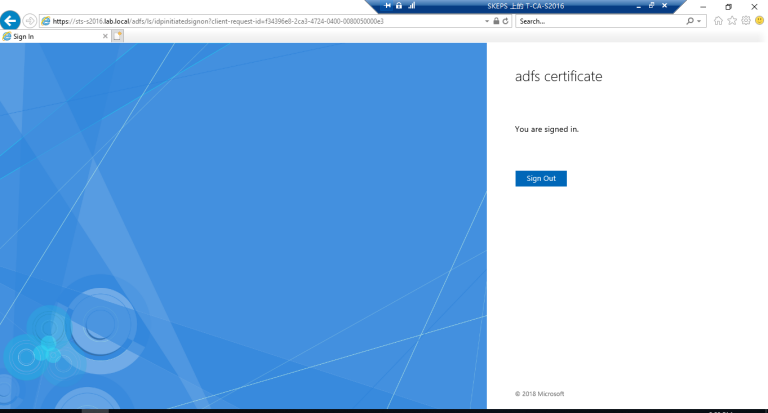
3.5 访问以下地址以验证 ADFS登录验证页面请
https://sts-s2016.lab.local/adfs/ls/idpinitiatedsignon.aspx 出现以下页面说明验证页面正常。 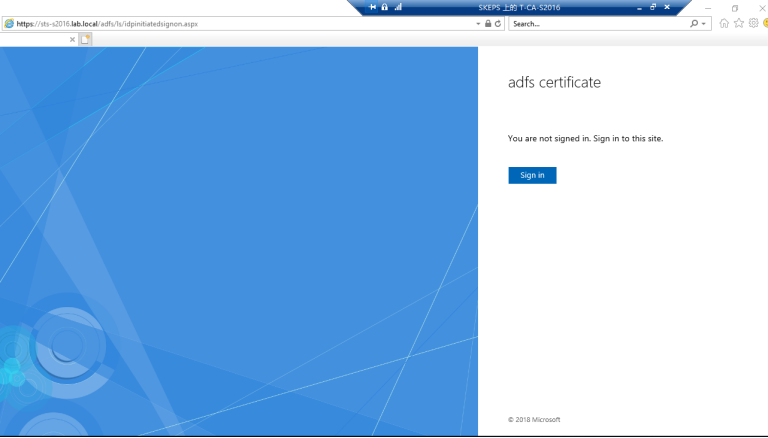
配置Exchange 邮件服务器使用ADFS验证的方式登录
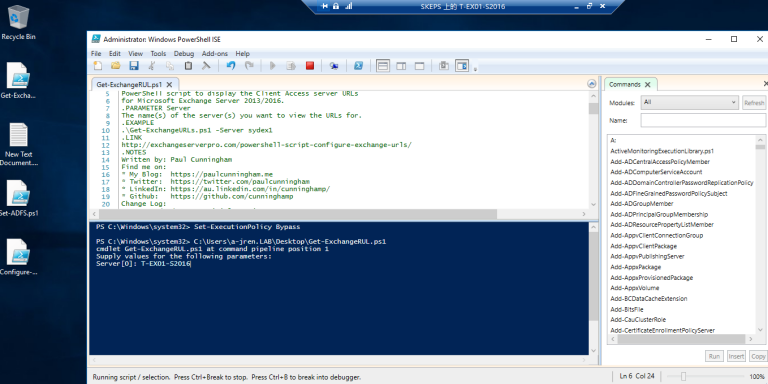
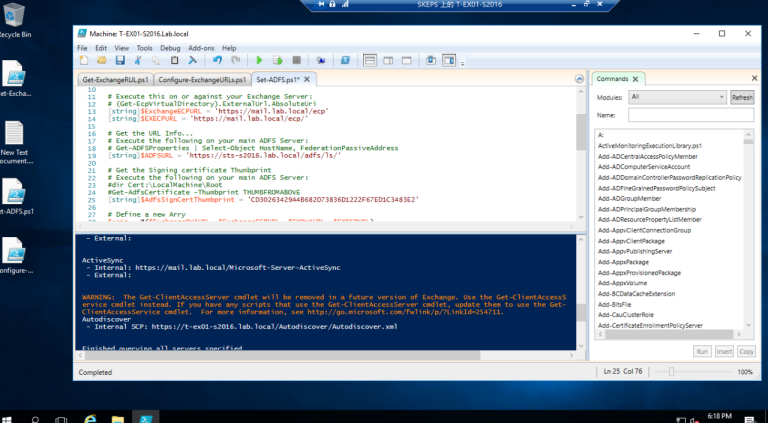
1. 域管理员账号登录到Exchane 服务器T-EX01-S2016, 运行编辑好的PowerShell 脚本Get-ExchangeURL.PS1 获取虚拟目录URL
检查虚拟目录是否都已经改为mail.lab.local,由于之前我们在配置邮件服务器的时候已经配置过虚拟目录了了,因此不需要更改了,如果需要更改可以通过ECP 去更改,也可以通过PowerShell脚本更改。
<#
.SYNOPSIS
GetExchangeURLs.ps1
.DESCRIPTION
PowerShell script to display the Client Access server URLs
for Microsoft Exchange Server 2013/2016.
.PARAMETER Server
The name(s) of the server(s) you want to view the URLs for.
.EXAMPLE
.\Get-ExchangeURLs.ps1 -Server sydex1
.LINK
http://exchangeserverpro.com/powershell-script-configure-exchange-urls/
.NOTES
Written by: Microsoft product lover
#>

#requires -version 2

[CmdletBinding()]
param(
	[Parameter( Position=0,Mandatory=$true)]
	[string[]]$Server
	)


#...................................
# Script
#...................................

Begin {

    #Add Exchange snapin if not already loaded in the PowerShell session
    if (Test-Path $env:ExchangeInstallPath\bin\RemoteExchange.ps1)
    {
	    . $env:ExchangeInstallPath\bin\RemoteExchange.ps1
	    Connect-ExchangeServer -auto -AllowClobber
    }
    else
    {
        Write-Warning "Exchange Server management tools are not installed on this computer."
        EXIT
    }
}

Process {

    foreach ($i in $server)
    {
        if ((Get-ExchangeServer $i -ErrorAction SilentlyContinue).IsClientAccessServer)
        {
            Write-Host "----------------------------------------"
            Write-Host " Querying $i"
            Write-Host "----------------------------------------`r`n"
            Write-Host "`r`n"

            $OA = Get-OutlookAnywhere -Server $i -AdPropertiesOnly | Select InternalHostName,ExternalHostName
            Write-Host "Outlook Anywhere"
            Write-Host " - Internal: $($OA.InternalHostName)"
            Write-Host " - External: $($OA.ExternalHostName)"
            Write-Host "`r`n"

            $OWA = Get-OWAVirtualDirectory -Server $i -AdPropertiesOnly | Select InternalURL,ExternalURL
            Write-Host "Outlook Web App"
            Write-Host " - Internal: $($OWA.InternalURL)"
            Write-Host " - External: $($OWA.ExternalURL)"
            Write-Host "`r`n"

            $ECP = Get-ECPVirtualDirectory -Server $i -AdPropertiesOnly | Select InternalURL,ExternalURL
            Write-Host "Exchange Control Panel"
            Write-Host " - Internal: $($ECP.InternalURL)"
            Write-Host " - External: $($ECP.ExternalURL)"
            Write-Host "`r`n"

            $OAB = Get-OABVirtualDirectory -Server $i -AdPropertiesOnly | Select InternalURL,ExternalURL
            Write-Host "Offline Address Book"
            Write-Host " - Internal: $($OAB.InternalURL)"
            Write-Host " - External: $($OAB.ExternalURL)"
            Write-Host "`r`n"

            $EWS = Get-WebServicesVirtualDirectory -Server $i -AdPropertiesOnly | Select InternalURL,ExternalURL
            Write-Host "Exchange Web Services"
            Write-Host " - Internal: $($EWS.InternalURL)"
            Write-Host " - External: $($EWS.ExternalURL)"
            Write-Host "`r`n"

            $MAPI = Get-MAPIVirtualDirectory -Server $i -AdPropertiesOnly | Select InternalURL,ExternalURL
            Write-Host "MAPI"
            Write-Host " - Internal: $($MAPI.InternalURL)"
            Write-Host " - External: $($MAPI.ExternalURL)"
            Write-Host "`r`n"

            $EAS = Get-ActiveSyncVirtualDirectory -Server $i -AdPropertiesOnly | Select InternalURL,ExternalURL
            Write-Host "ActiveSync"
            Write-Host " - Internal: $($EAS.InternalURL)"
            Write-Host " - External: $($EAS.ExternalURL)"
            Write-Host "`r`n"

            $AutoD = Get-ClientAccessServer $i | Select AutoDiscoverServiceInternalUri
            Write-Host "Autodiscover"
            Write-Host " - Internal SCP: $($AutoD.AutoDiscoverServiceInternalUri)"
            Write-Host "`r`n"

        }
        else
        {
            Write-Host -ForegroundColor Yellow "$i is not a Client Access server."
        }
    }
}

End {

    Write-Host "Finished querying all servers specified."

}

#...................................
# Finished
#...................................
2. 域管理员账号登录到邮件服务器上,现在使用PowerShell脚本来设置ADFS身份验证,以便让Exchange 邮件服务器使用ADFS身份验证了。
#Execute this on or against your Exchange Server:
#Set-ExecutionPolicy Unrestricted -Confirm:$false
#Connect to Exchange server
. $env:ExchangeInstallPath\bin\RemoteExchange.ps
Connect-ExchangeServer -auto -AllowClobber
#Execute this on or against your Exchange Server:
#(Get-OwaVirtualDirectory).ExternalUrl.AbsoluteUri
[string]$ExchangeOWAURL = 'https://mail.lab.local/owa'
[string]$EXOWAURL = 'https://mail.lab.local/owa/'
#Execute this on or against your Exchange Server:
#(Get-EcpVirtualDirectory).ExternalUrl.AbsoluteUri
[string]$ExchangeECPURL = 'https://mail.lab.local/ecp'
[string]$EXECPURL = 'https://mail.lab.local/ecp/'
#Get the URL Info...
#Execute the following on your main ADFS Server:
#Get-ADFSProperties | Select-Object HostName, FederationPassiveAddress
[string]$ADFSURL = 'https://T-ADFS-S2016.lab.local/adfs/ls/'
#Get the Signing certificate Thunbprint
#Execute the following on your main ADFS Server:
#dir Cert:\LocalMachine\Root
#Get-AdfsCertificate -Thumbprint THUMBFROMABOVE
[string]$AdfsSignCertThumbprint = 'AAE7E1659D93983D659EEB25464DD8F9E6A5BE72'
#Define a new Arry
$uris = @($ExchangeOWAURL, $ExchangeECPURL, $EXOWAURL, $EXECPURL)
#Apply the new Exchange Organisation settings
Set-OrganizationConfig -AdfsIssuer $ADFSURL -AdfsAudienceUris $uris -AdfsSignCertificateThumbprint $AdfsSignCertThumbprint
#Enable AD FS only
Get-EcpVirtualDirectory | Set-EcpVirtualDirectory -AdfsAuthentication $true -BasicAuthentication $false -DigestAuthentication $false -FormsAuthentication $false -WindowsAuthentication $false
Get-OwaVirtualDirectory | Set-OwaVirtualDirectory -AdfsAuthentication $true -BasicAuthentication $false -DigestAuthentication $false -FormsAuthentication $false -WindowsAuthentication $false -OAuthAuthentication $false
#If you want to revert that
#Get-OwaVirtualDirectory | Set-OwaVirtualDirectory -AdfsAuthentication $false -BasicAuthentication $true -DigestAuthentication $true -FormsAuthentication $true -WindowsAuthentication $true -OAuthAuthentication $false
#Get-EcpVirtualDirectory | Set-EcpVirtualDirectory -AdfsAuthentication $false -BasicAuthentication $true -DigestAuthentication $true -FormsAuthentication $true -WindowsAuthentication $true
我们需要修改脚本,以确保ADFS URL主机是通用的和DNS名称,这次是 https://sts-s2016.lab.local/adfs/ls/
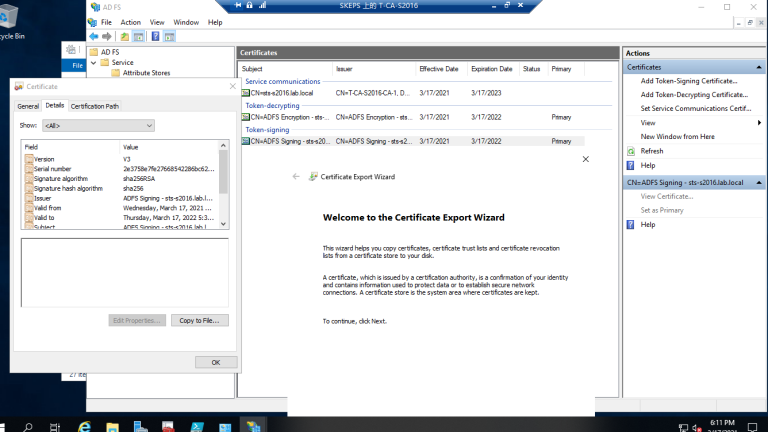
3. 我们还需要确保ADFS==令牌签名证书==被复制并安装在Exchange 邮件服务器的计算机受信任的根证书存储上。并从ADFS标记签名证书获得指纹。
3.1 现在转到ADFS管理,导出令牌签名cer并保存到Exhange服务器的文件夹下。
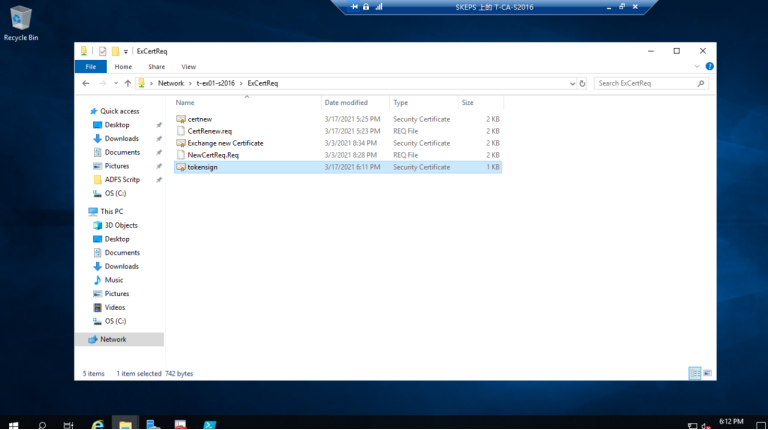
3.2 拷贝到Exchange 服务器的文件夹里
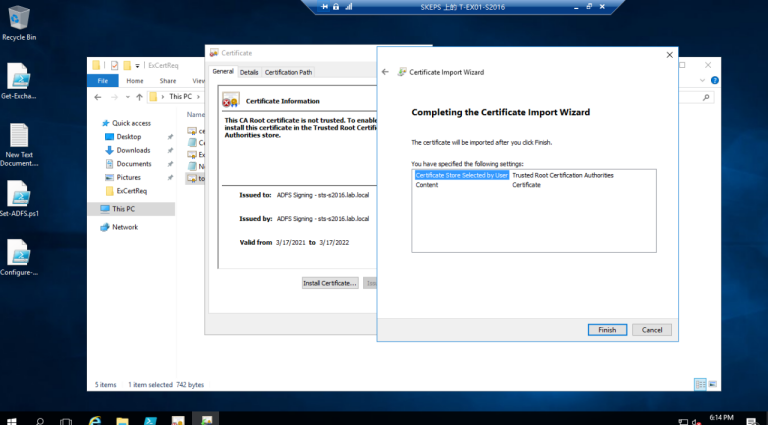
3.3 导入令牌签名证书并安装到Exchange 服务器本地机器受信任的根存储区
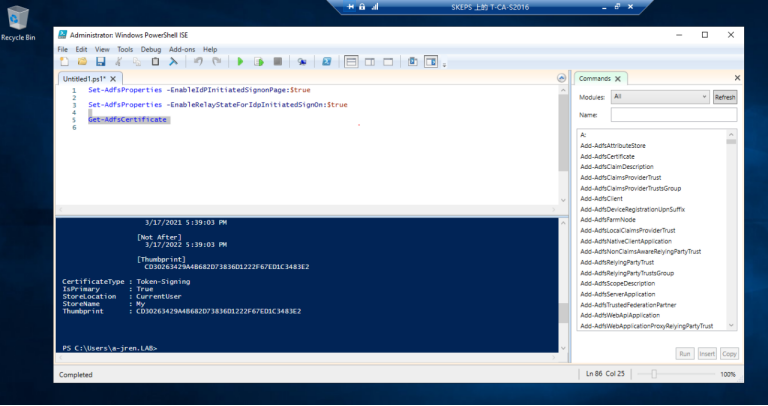
3.4 转到ADFS服务器以检查令牌符号证书的拇指指纹,使用Get-ADFS证书PS cmdlet 查看证书指纹
3.5 将拇指指纹复制到Set-ADFS.PS1 的PS脚本中,并执行该脚本.
#Set-ExecutionPolicy Unrestricted -Confirm:$false
#Connect to Exchange server
. $env:ExchangeInstallPath\bin\RemoteExchange.ps1
	    Connect-ExchangeServer -auto -AllowClobber

# Execute this on or against your Exchange Server:
# (Get-OwaVirtualDirectory).ExternalUrl.AbsoluteUri
[string]$ExchangeOWAURL = 'https://mail.lab.local/owa'
[string]$EXOWAURL = 'https://mail.lab.local/owa/'

# Execute this on or against your Exchange Server:
# (Get-EcpVirtualDirectory).ExternalUrl.AbsoluteUri
[string]$ExchangeECPURL = 'https://mail.lab.local/ecp'
[string]$EXECPURL = 'https://mail.lab.local/ecp/'

# Get the URL Info...
# Execute the following on your main ADFS Server:
# Get-ADFSProperties | Select-Object HostName, FederationPassiveAddress
[string]$ADFSURL = 'https://T-ADFS-S2016.lab.local/adfs/ls/'

# Get the Signing certificate Thunbprint
# Execute the following on your main ADFS Server:
#dir Cert:\LocalMachine\Root
#Get-AdfsCertificate -Thumbprint THUMBFROMABOVE
[string]$AdfsSignCertThumbprint = 'AAE7E1659D93983D659EEB25464DD8F9E6A5BE72'

# Define a new Arry
$uris = @($ExchangeOWAURL, $ExchangeECPURL, $EXOWAURL, $EXECPURL)

# Apply the new Exchange Organisation settings
Set-OrganizationConfig -AdfsIssuer $ADFSURL -AdfsAudienceUris $uris -AdfsSignCertificateThumbprint $AdfsSignCertThumbprint

# Enable AD FS only
Get-EcpVirtualDirectory | Set-EcpVirtualDirectory -AdfsAuthentication $true -BasicAuthentication $false -DigestAuthentication $false -FormsAuthentication $false -WindowsAuthentication $false

Get-OwaVirtualDirectory | Set-OwaVirtualDirectory -AdfsAuthentication $true -BasicAuthentication $false -DigestAuthentication $false -FormsAuthentication $false -WindowsAuthentication $false -OAuthAuthentication $false

# If you want to revert that
#Get-OwaVirtualDirectory | Set-OwaVirtualDirectory -AdfsAuthentication $false -BasicAuthentication $true -DigestAuthentication $true -FormsAuthentication $true -WindowsAuthentication $true -OAuthAuthentication $false

#Get-EcpVirtualDirectory | Set-EcpVirtualDirectory -AdfsAuthentication $false -BasicAuthentication $true -DigestAuthentication $true -FormsAuthentication $true -WindowsAuthentication $true
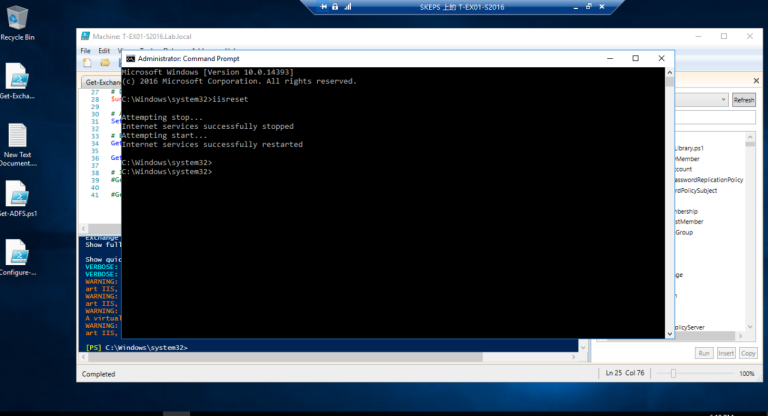
3.6 重置IIS以生效
验证ADFS 登录是否生效
1. 当测试从Exchange 服务器T-V-EX-S19打开的https://mail.lab.local/ecp时,它给出了以下错误:
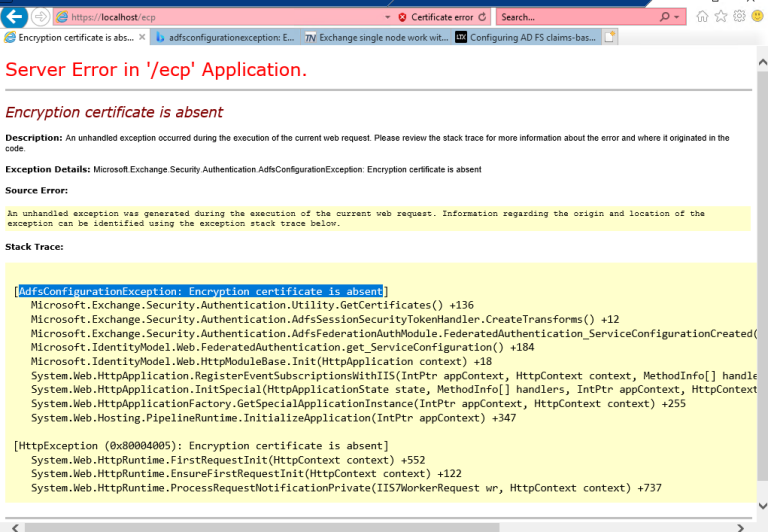
1.1 修复此错误需要登录到Exchange 服务器运行power shell作为管理员来检查
Exchange 服务器证书,以管理员身份运行powershell_ISE 运行Run Get-OwaVirtualDirectory | fl*authentication,检查ADFS验证集是否为真 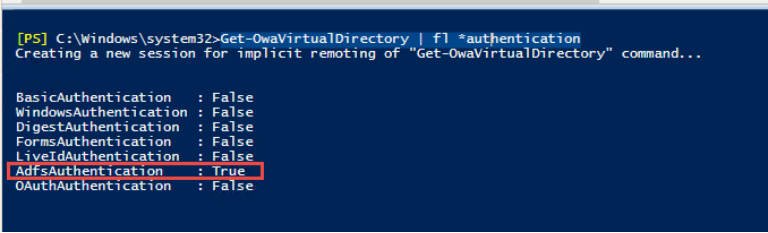
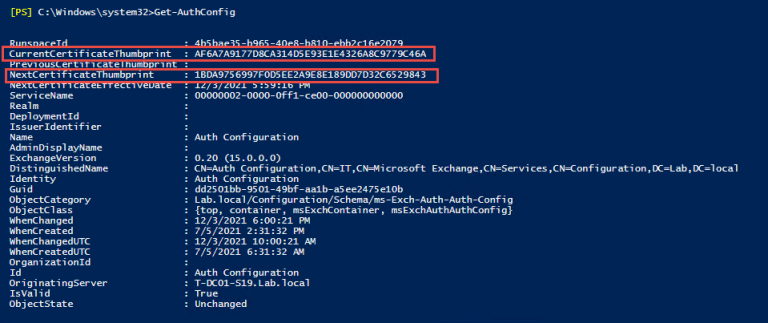
1.2 运行Get-AuthConfig检查当前验证证书指纹,显示当前验证指纹以******9C46A结束

1.3 运行Get-ExchangeCertificate来检查Exchange证书,它显示以******29843结束,潜在的原因是认证指纹与Exhange证书不同

1.4 运行 Set-AuthConfig -NewCertificateThumbprint ******29843 -NewCertificateEffectiveDate $Date

1.5 运行 Get-AuthConfig, 我们可以看到当前的认证证书和下一个身份验证证书
1.6 运行 Set-AuthConfig -publishCertificate 来发布新的认证证书,然后运行
Set-AuthConfig -ClearPreviousCertificate 来删除之前的认证证书 然后再次运行 Get-AuthConfig 检查认证证书指纹是否与Exchange 服务器证书指纹一致。 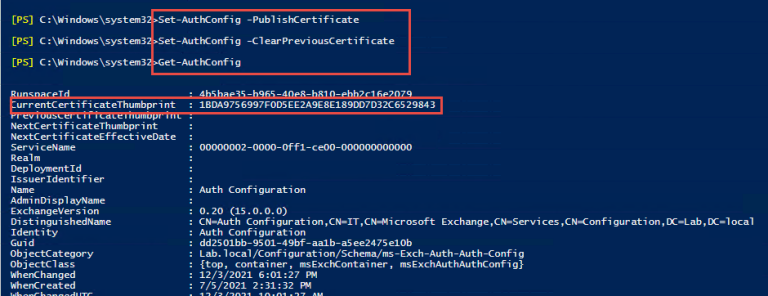
1.7 重启IIS 服务器生效
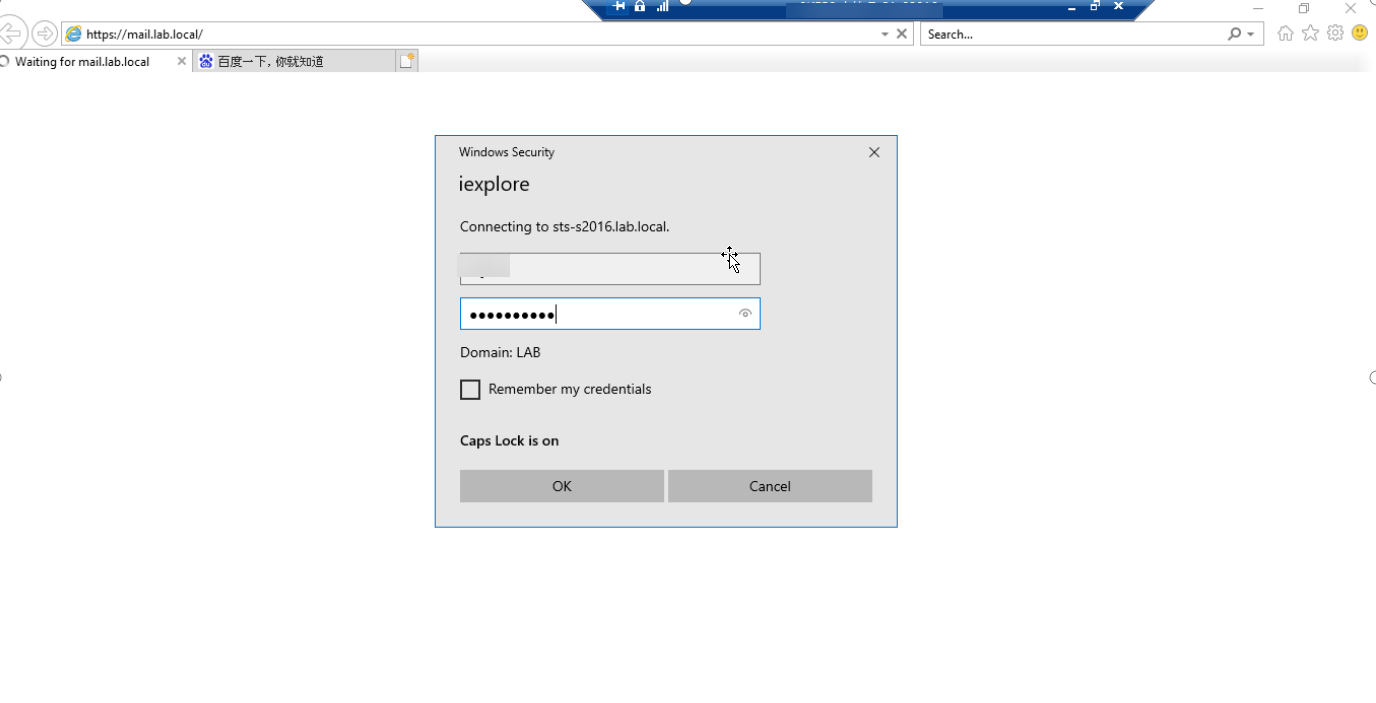
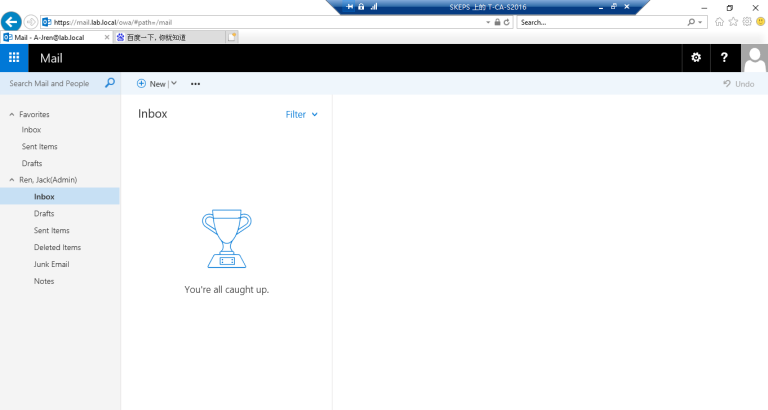
2. 现在转到CA服务器浏览器到 https://mail.lab.local/ecp或https://mail.lab.local/owa 测试ADFS,输入用户名和密码后会自动跳转登录成功。
3. 彻底实现不需要输入用户名和密码自动实现SSO登录
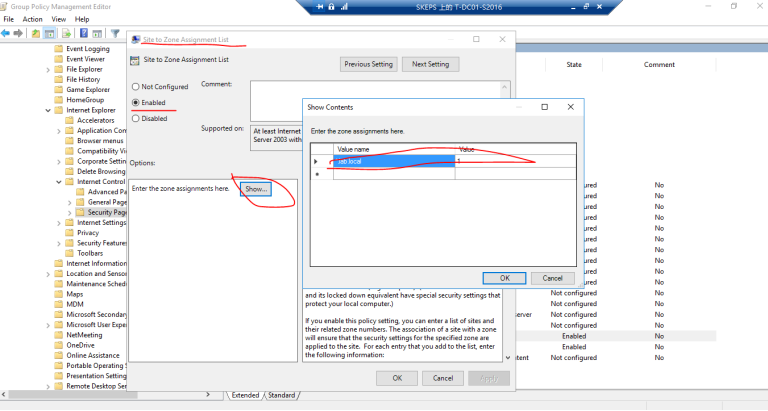
3.1 如果我们想要SSO,我们还需要使用GPO来部署内部网站点的自动检测
==Polices ---- Administrative templates ---- Windows Components ---- Internet Explorer ---Internet Control Panel --- Security Page --- Site to zone assignment list (Enabled) Turn on automatic detection of intranet (Enabled)== 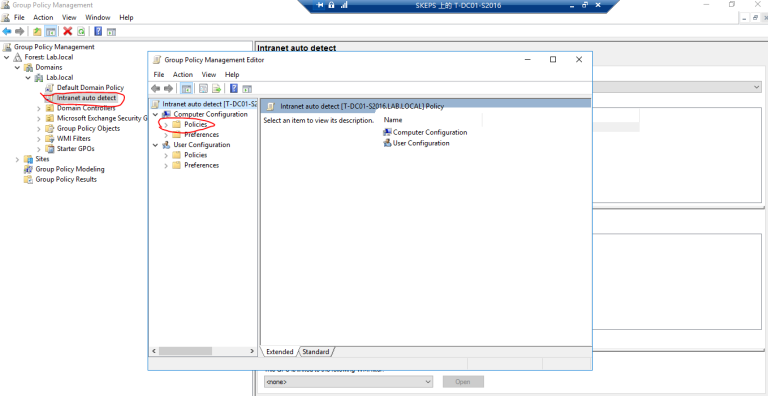
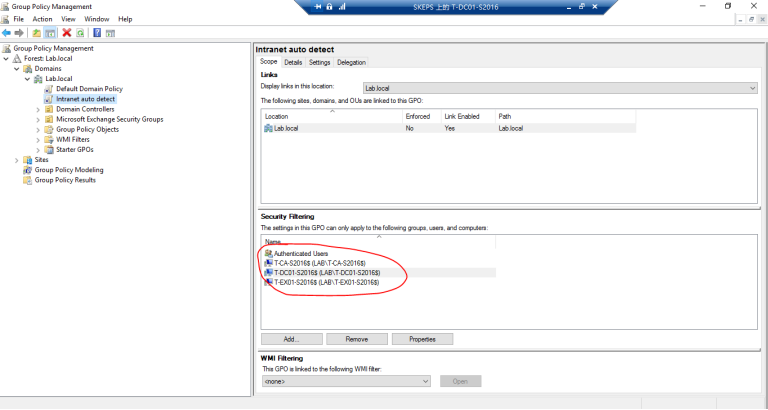
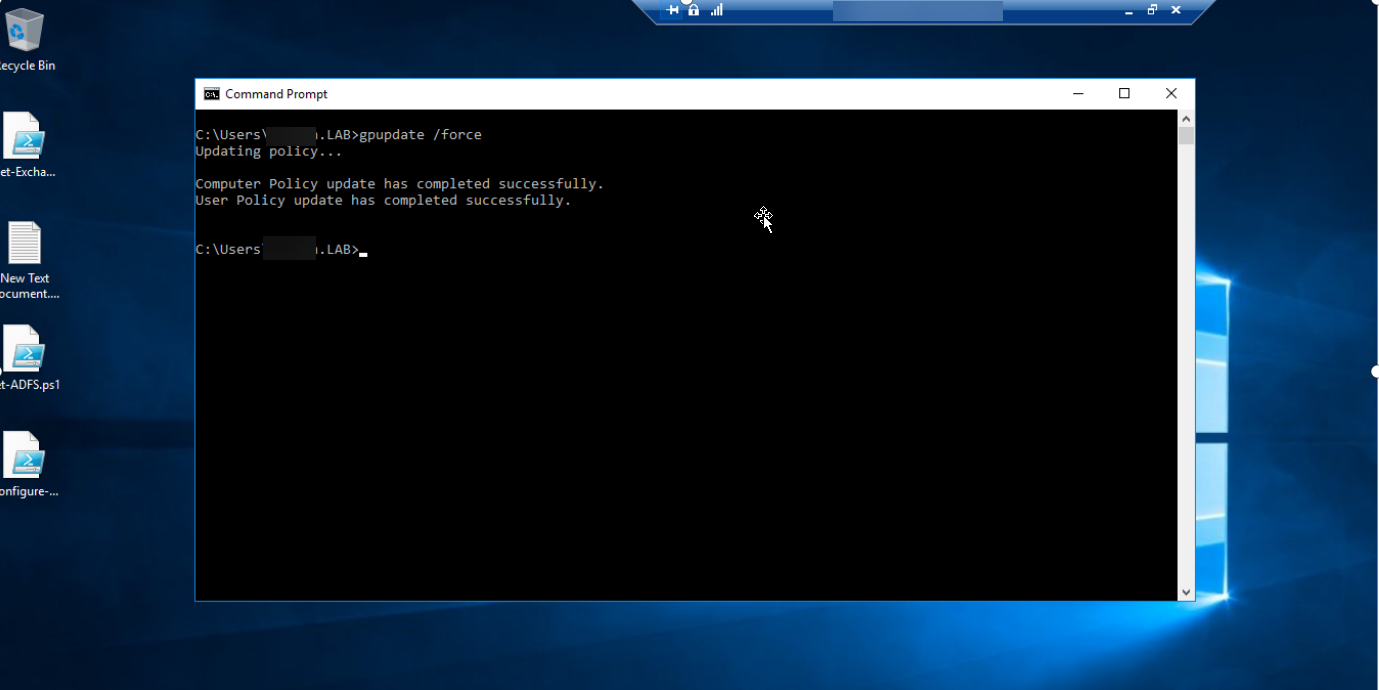
3.2 在Exchange 服务器上运行gpupdate
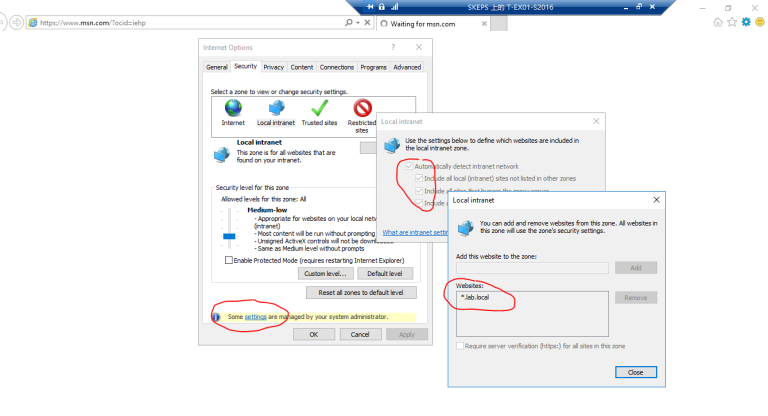
3.3 检查 Intranet 站点设置
3.4 测试登录 https://mail.lab.local/ecp 和https://mail.lab.local/owa 成功实现IE浏览器单点登录

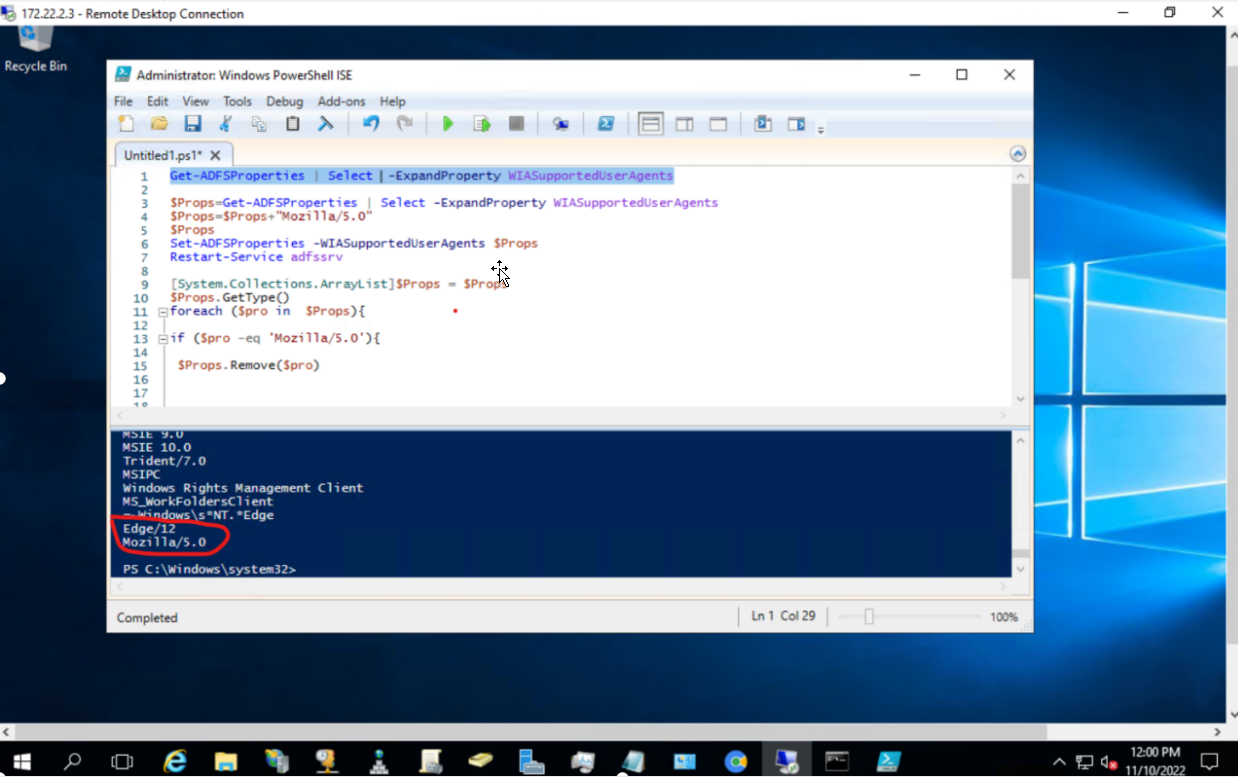
3.5 设置Edge 浏览器实现SSO单点登录,在ADFS 服务器上以管理员身份运行Powershell_ISE,执行以下命令:
$Props=Get-ADFSProperties | Select -ExpandProperty WIASupportedUserAgents
$Props=$Props+"Mozilla/5.0"
$Props
Set-ADFSProperties -WIASupportedUserAgents $Props
Restart-Service adfssrv
3.6 验证是否写入”Mozilla/5.0” 运行以下命令:可以看到已经写入Edge/12 和 ”Mozilla/5.0”
Get-ADFSProperties | Select -ExpandProperty WIASupportedUserAgents
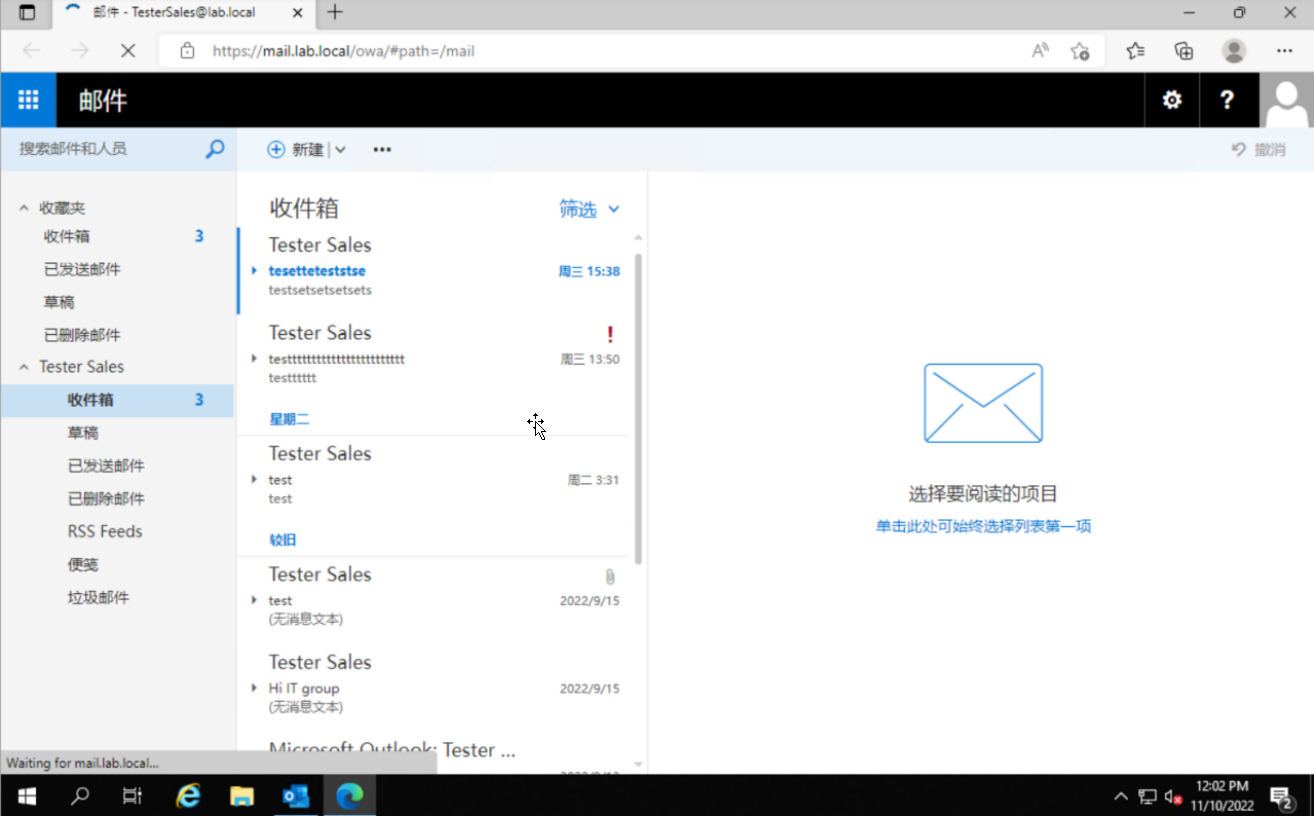
3.7 登录OWA 测试效果:
好了,今天的ADFS配置就到这里完全配置好了,接下来我们学习如何配置Exhange邮件服务器的邮箱配额管理和邮件恢复技术