
今天,我们将迅速着手搭建一个高效且富有创意的混元聊天应用,其核心理念可以用一个字来概括——快。在这个快节奏的时代,构建一个基础的LLM(Large Language Model,大型语言模型)聊天应用并不需要耗费太多时间。市面上充斥着各种功能强大的大型语言模型,我们可以根据项目需求灵活选择,而今天的目标并非深入探讨这些模型的技术细节,而是将重点放在如何快速上手。
Streamlit这一强大的工具,它能够让我们以最快速度搭建起一个具备流式打字机效果的聊天应用。对于那些和我一样,对前端代码望而却步的开发者来说,Streamlit无疑是一个福音。
本次实操,我们将不会过多地纠缠于理论知识,而是将重点放在实战操作上。
开始开发
依赖环境
开发之前,请确保你已经配置好了必要的开发环境,以下是你需要准备的一系列环境和工具,以确保开发过程的顺利进行:
Python环境:Python 3.9
腾讯云API服务:从腾讯云控制台开通混元API并且获取腾讯云的SecretID、SecretKey
依赖包安装:
pip install --upgrade tencentcloud-sdk-python
pip install streamlit
如果你对Streamlit还不太熟悉,安装完成后,你可以通过执行streamlit hello或者python -m streamlit hello启动一下入门实例。如果你希望对Streamlit有更深入的了解,我强烈建议你访问其官方文档。官方文档提供了详尽的指南、教程和API参考。
简易流程
首先,请查阅腾讯云官方简易流程,然后,一旦您成功获取相关信息的申请,填入并检查输出是否正常。
import os
from tencentcloud.common import credential
from tencentcloud.common.exception.tencent_cloud_sdk_exception import TencentCloudSDKException
from tencentcloud.cvm.v20170312 import cvm_client, models
try:
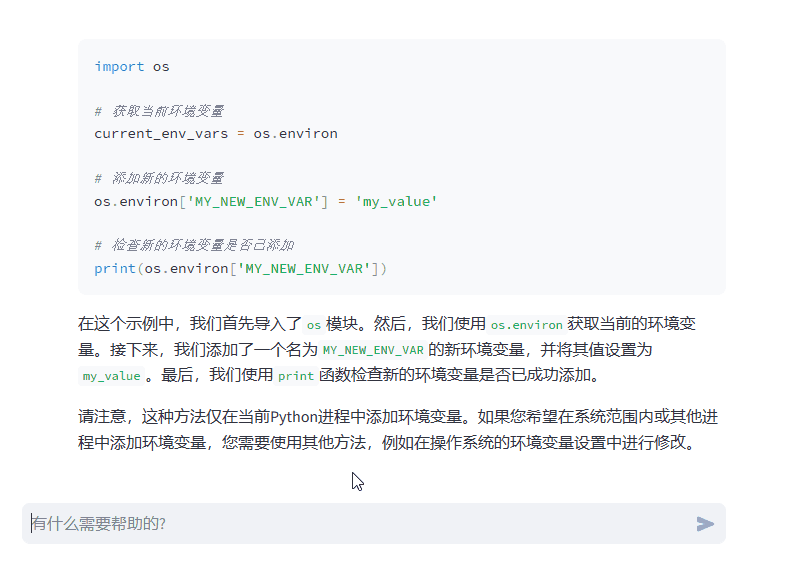
# 为了保护密钥安全,建议将密钥设置在环境变量中或者配置文件中,请参考本文凭证管理章节。
# 硬编码密钥到代码中有可能随代码泄露而暴露,有安全隐患,并不推荐。
# cred = credential.Credential("secretId", "secretKey")
cred = credential.Credential(
os.environ.get("TENCENTCLOUD_SECRET_ID"),
os.environ.get("TENCENTCLOUD_SECRET_KEY"))
client = cvm_client.CvmClient(cred, "ap-shanghai")
req = models.DescribeInstancesRequest()
resp = client.DescribeInstances(req)
print(resp.to_json_string())
except TencentCloudSDKException as err:
print(err)
如果输出结果呈现是这样的,这便表明所得信息基本正确的,接下来我们便可顺利进行后续的开发工作。
"TotalCount": 0, "InstanceSet": [], "RequestId": "714808e9-684a-4714-96f1-2a9fe77b6e55"
接下来,让我们深入了解Streamlit是如何构建基础的LLM(大型语言模型)聊天应用的,一起查看一下他们的官方演示代码吧。
import streamlit as st
import random
import time

# Streamed response emulator
def response_generator():
    response = random.choice(
        [
            "Hello there! How can I assist you today?",
            "Hi, human! Is there anything I can help you with?",
            "Do you need help?",
        ]
    )
    for word in response.split():
        yield word + " "
        time.sleep(0.05)

st.title("Simple chat")

# Initialize chat history
if "messages" not in st.session_state:
    st.session_state.messages = []

# Display chat messages from history on app rerun
for message in st.session_state.messages:
    with st.chat_message(message["role"]):
        st.markdown(message["content"])

# Accept user input
if prompt := st.chat_input("What is up?"):
    # Add user message to chat history
    st.session_state.messages.append({"role": "user", "content": prompt})
    # Display user message in chat message container
    with st.chat_message("user"):
        st.markdown(prompt)

    # Display assistant response in chat message container
    with st.chat_message("assistant"):
        response = st.write_stream(response_generator())
    # Add assistant response to chat history
    st.session_state.messages.append({"role": "assistant", "content": response})
切记,在运行Streamlit时,不要使用python命令,而应该使用streamlit run [your_script.py],否则可能会持续遇到错误提示。
观察了代码后,可以看出基本框架已经建立好了,接下来的步骤就是替换请求和响应部分。
关于请求和响应的实例,腾讯官方也提供了相关内容。你可以查看以下链接以获取更多信息:
经过5分钟的修改和代码改进,最终成功地实现了可运行的版本。
还是一样的规矩,最终代码如下:
import json
import os
import streamlit as st
import random
import time

from tencentcloud.common import credential
from tencentcloud.common.exception.tencent_cloud_sdk_exception import TencentCloudSDKException
from tencentcloud.common.profile.client_profile import ClientProfile
from tencentcloud.hunyuan.v20230901 import hunyuan_client, models

st.title("混元小助手")
os.environ['id'] = '******'
os.environ['key'] = '******'

# 实例化一个认证对象,入参需要传入腾讯云账户secretId,secretKey
cred = credential.Credential(
    os.environ.get("id"),
    os.environ.get("key"))
cpf = ClientProfile()
# 预先建立连接可以降低访问延迟
cpf.httpProfile.pre_conn_pool_size = 3
client = hunyuan_client.HunyuanClient(cred, "ap-beijing", cpf)
req = models.ChatStdRequest()

# Streamed response emulator
def response_generator():
    # msg = models.Message()
    # msg.Role = "user"
    # msg.Content = content
    req.Messages = []
    for m in st.session_state.messages:
        msg = models.Message()
        msg.Role = m["role"]
        msg.Content = m["content"]
        req.Messages.append(msg)

    resp = client.ChatStd(req)

    for event in resp:
        data = json.loads(event['data'])
        for choice in data['Choices']:
            yield choice['Delta']['Content'] + ""


# Initialize chat history
if "messages" not in st.session_state:
    st.session_state.messages = []

# Display chat messages from history on app rerun
for message in st.session_state.messages:
    with st.chat_message(message["role"]):
        st.markdown(message["content"])

# Accept user input
if prompt := st.chat_input("有什么需要帮助的?"):
    # Add user message to chat history
    st.session_state.messages.append({"role": "user", "content": prompt})
    # Display user message in chat message container
    with st.chat_message("user"):
        st.markdown(prompt)
    # Display assistant response in chat message container
    with st.chat_message("assistant"):
        response = st.write_stream(response_generator())
    # Add assistant response to chat history
    st.session_state.messages.append({"role": "assistant", "content": response})
在这里需要注意一下,当使用streamlit进行流式回答时,你无需手动返回文本数据,只需在方法内部使用yield关键字,并注明本次返回的内容即可。
演示视频看下吧:
总结
本文介绍了如何快速搭建一个基于大型语言模型(LLM)的混元聊天应用。强调了开发速度的重要性,并指出了使用Streamlit这一工具的优势,特别是对于不熟悉前端代码的开发者来说,Streamlit提供了一种快速构建聊天应用的方法。
如果你对开发感兴趣,市面上确实提供了许多大型模型供你选择。即使简单的聊天应用并不具备太多技术性,但你可以利用这些基础框架,不断添加自己所需的任何组件。这需要开拓思维,挖掘创意,让你的应用更加丰富多彩。