大家好,我是小悟
Spring Boot官网各类启动器:
https://docs.spring.io/spring-boot/docs/current/reference/html/using-boot-build-systems.html#using-boot-starter
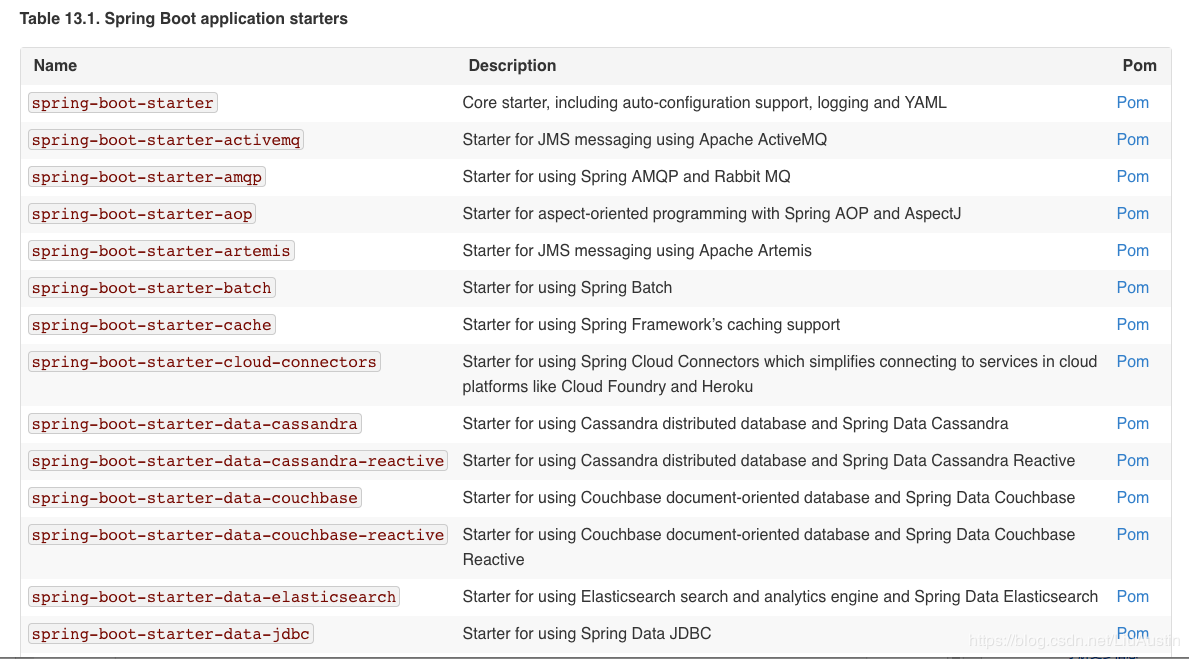
Spring Boot将所有的功能场景都抽取出来,做成一个个starter,只需要在项目里面引入这些starter,相关的依赖包都会导入进来,可以说是十分的方便了。在日常的开发中,我们也可以结合业务自定义需要的starter,供其他开发小伙伴调用。
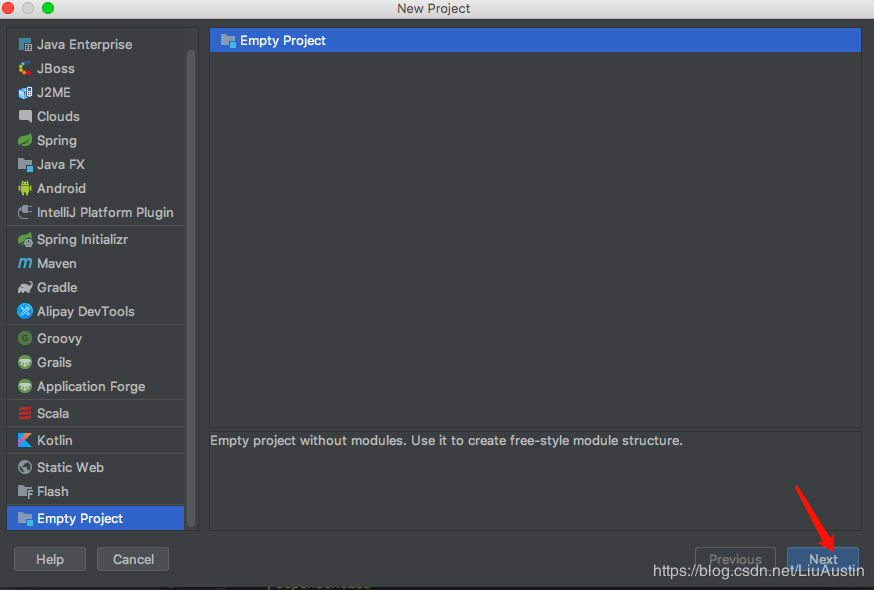
1、创建一个新的空工程
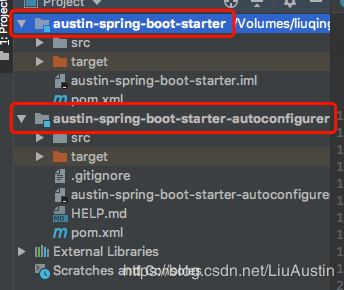
2、创建两个module,austin-spring-boot-starter启动器是普通的maven工程,austin-spring-boot-starter-autoconfigurer自动配置模块是普通的springboot工程
austin-spring-boot-starter的pom文件
<?xml version="1.0" encoding="UTF-8"?>
<project xmlns="http://maven.apache.org/POM/4.0.0"
         xmlns:xsi="http://www.w3.org/2001/XMLSchema-instance"
         xsi:schemaLocation="http://maven.apache.org/POM/4.0.0 http://maven.apache.org/xsd/maven-4.0.0.xsd">
<modelVersion>4.0.0</modelVersion>

<groupId>com.austin.starter</groupId>
<artifactId>austin-spring-boot-starter</artifactId>
<version>1.0-SNAPSHOT</version>

<!--启动器-->
<dependencies>

    <!--引入自动配置模块-->
    <dependency>
        <groupId>com.austin.starter</groupId>
        <artifactId>austin-spring-boot-starter-autoconfigurer</artifactId>
        <version>0.0.1-SNAPSHOT</version>
    </dependency>
</dependencies>

</project>
austin-spring-boot-starter-autoconfigurer的pom文件
<?xml version="1.0" encoding="UTF-8"?>
<project xmlns="http://maven.apache.org/POM/4.0.0" xmlns:xsi="http://www.w3.org/2001/XMLSchema-instance"
         xsi:schemaLocation="http://maven.apache.org/POM/4.0.0 http://maven.apache.org/xsd/maven-4.0.0.xsd">
    <modelVersion>4.0.0</modelVersion>
    <parent>
        <groupId>org.springframework.boot</groupId>
        <artifactId>spring-boot-starter-parent</artifactId>
        <version>2.1.6.RELEASE</version>
        <relativePath/> <!-- lookup parent from repository -->
    </parent>
    <groupId>com.austin.starter</groupId>
    <artifactId>austin-spring-boot-starter-autoconfigurer</artifactId>
    <version>0.0.1-SNAPSHOT</version>
    <name>austin-spring-boot-starter-autoconfigurer</name>
    <description>Demo project for Spring Boot</description>

    <properties>
        <java.version>1.8</java.version>
    </properties>

    <dependencies>
        <!--引入spring‐boot‐starter;所有starter的基本配置-->
        <dependency>
            <groupId>org.springframework.boot</groupId>
            <artifactId>spring-boot-starter</artifactId>
        </dependency>

        <dependency>
            <groupId>org.projectlombok</groupId>
            <artifactId>lombok</artifactId>
            <optional>true</optional>
        </dependency>

    </dependencies>

</project>
3、在austin-spring-boot-starter的pom文件中引入自动配置模块,如下所示
<?xml version="1.0" encoding="UTF-8"?>
<project xmlns="http://maven.apache.org/POM/4.0.0"
         xmlns:xsi="http://www.w3.org/2001/XMLSchema-instance"
         xsi:schemaLocation="http://maven.apache.org/POM/4.0.0 http://maven.apache.org/xsd/maven-4.0.0.xsd">
    <modelVersion>4.0.0</modelVersion>

    <groupId>com.austin.starter</groupId>
    <artifactId>austin-spring-boot-starter</artifactId>
    <version>1.0-SNAPSHOT</version>

    <!--启动器-->
    <dependencies>

        <!--引入自动配置模块-->
        <dependency>
            <groupId>com.austin.starter</groupId>
            <artifactId>austin-spring-boot-starter-autoconfigurer</artifactId>
            <version>0.0.1-SNAPSHOT</version>
        </dependency>
    </dependencies>

</project>
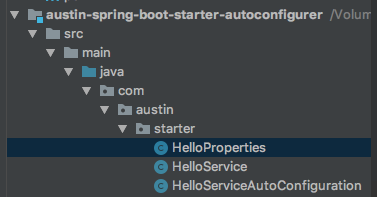
4、在austin-spring-boot-starter-autoconfigurer下新建HelloProperties、HelloService、HelloServiceAutoConfiguration
package com.austin.starter;
import lombok.Data;
import org.springframework.boot.context.properties.ConfigurationProperties;
/**
* @ClassName HelloProperties
* @Description
*/
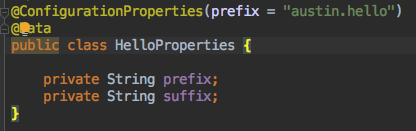
@ConfigurationProperties(prefix = "austin.hello")
@Data
public class HelloProperties {
private String prefix;
private String suffix;
}
package com.austin.starter;

import lombok.Data;

/**
 * @ClassName HelloService
 * @Description
 */
@Data
public class HelloService {

    HelloProperties helloProperties;

    public String sayHello(String name){
        return helloProperties.getPrefix() + "-" + name + "-" + helloProperties.getSuffix();
    }
}
package com.austin.starter;

import org.springframework.beans.factory.annotation.Autowired;
import org.springframework.boot.autoconfigure.condition.ConditionalOnWebApplication;
import org.springframework.boot.context.properties.EnableConfigurationProperties;
import org.springframework.context.annotation.Bean;
import org.springframework.context.annotation.Configuration;

/**
 * @ClassName HelloServiceAutoConfiguration
 * @Description
 */
@Configuration
@ConditionalOnWebApplication//web应用才生效
@EnableConfigurationProperties(HelloProperties.class)//让配置属性文件生效
public class HelloServiceAutoConfiguration {

    @Autowired
    HelloProperties helloProperties;

    @Bean
    public HelloService helloService(){
        HelloService service = new HelloService();
        service.setHelloProperties(helloProperties);
        return service;
    }
}
5、resources下面新建META-INF-spring.factories文件

内容如下
# Auto Configure
org.springframework.boot.autoconfigure.EnableAutoConfiguration=\
com.austin.starter.HelloServiceAutoConfiguration
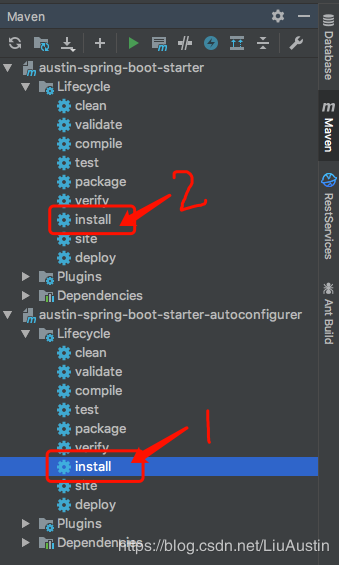
因为starter是依赖autoconfigurer的,所以先把autoconfigurer安装到本地仓库,再安装starter
6、另外新建一个springboot工程来测试我们自定义的starter


7、新建一个controller来测试
package com.austin.custom.controller;
import com.austin.starter.HelloService;
import org.springframework.beans.factory.annotation.Autowired;
import org.springframework.web.bind.annotation.GetMapping;
import org.springframework.web.bind.annotation.RestController;
/**
* @ClassName HelloController
* @Description
*/
@RestController
public class HelloController {
@Autowired
HelloService helloService;
@GetMapping(value = "/sayHello")
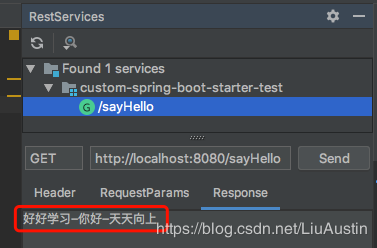
public String sayHello() {
return helloService.sayHello("你好");
}
}
在application.yml中传入我们在austin-spring-boot-starter-autoconfigurer定义的两个参数prefix和suffix

8、启动springboot测试
您的一键三连,是我更新的最大动力,谢谢
山水有相逢,来日皆可期,谢谢阅读,我们再会
我手中的金箍棒,上能通天,下能探海


