第一步:安装及运行控制
1.编译安装Squid
[root@pd001 ~]# tar zxf squid-3.5.23.tar.gz
[root@pd001 ~]# cd squid-3.5.23/
[root@pd001 squid-3.5.23]# ./configure --prefix=/usr/local/squid --sysconfdir=/etc --enable-linux-netfilter --enable-async-io=240 --enable-default-err-language=Simplify_Chinese --disable-poll --enable-epoll --enable-gnuregex
                           \\配置Squid的编译选项

[root@pd001 squid-3.5.23]#make

[root@pd001 squid-3.5.23]#make install
安装完成后,创建链接文件、创建用户和组
[root@pd001 ~]# ln -s /usr/local/squid/sbin/* /usr/local/sbin/
[root@pd001 ~]# useradd -M -s /sbin/nologin squid
[root@pd001 ~]# chown -R squid:squid /usr/local/squid/var/
2.修改Squid的配置文件
Squid服务的配置文件位于/etc/squid.conf,可根据实际情况灵活配置代理服务
[root@pd001 ~]# vim /etc/squid.conf
......//省略部分内容
cache_effective_user squid \\这一项指定squid的程序用户,用来设置初始化、运行时缓存的账号,否则启动不成功。
cache_effective_group squid
.........//省略部分内容

3.Squid的运行控制
输入squid -k parse命令检查配置文件语法是否正确
[root@pd001 ~]# squid -k parse
2022/10/13 12:15:38| Startup: Initializing Authentication Schemes ...
2022/10/13 12:15:38| Startup: Initialized Authentication Scheme 'basic'
2022/10/13 12:15:38| Startup: Initialized Authentication Scheme 'digest'
2022/10/13 12:15:38| Startup: Initialized Authentication Scheme 'negotiate'
2022/10/13 12:15:38| Startup: Initialized Authentication Scheme 'ntlm'
2022/10/13 12:15:38| Startup: Initialized Authentication.
2022/10/13 12:15:38| Processing Configuration File: /etc/squid.conf (depth 0)
2022/10/13 12:15:38| Processing: acl localnet src 10.0.0.0/8  # RFC1918 possible internal network
2022/10/13 12:15:38| Processing: acl localnet src 172.16.0.0/12 # RFC1918 possible internal network
2022/10/13 12:15:38| Processing: acl localnet src 192.168.0.0/16  # RFC1918 possible internal network
2022/10/13 12:15:38| Processing: acl localnet src fc00::/7       # RFC 4193 local private network range
2022/10/13 12:15:38| Processing: acl localnet src fe80::/10      # RFC 4291 link-local (directly plugged) machines
2022/10/13 12:15:38| Processing: acl SSL_ports port 443
2022/10/13 12:15:38| Processing: acl Safe_ports port 80   # http
2022/10/13 12:15:38| Processing: acl Safe_ports port 21   # ftp
2022/10/13 12:15:38| Processing: acl Safe_ports port 443    # https
2022/10/13 12:15:38| Processing: acl Safe_ports port 70   # gopher
2022/10/13 12:15:38| Processing: acl Safe_ports port 210    # wais
2022/10/13 12:15:38| Processing: acl Safe_ports port 1025-65535 # unregistered ports
2022/10/13 12:15:38| Processing: acl Safe_ports port 280    # http-mgmt
2022/10/13 12:15:38| Processing: acl Safe_ports port 488    # gss-http
2022/10/13 12:15:38| Processing: acl Safe_ports port 591    # filemaker
2022/10/13 12:15:38| Processing: acl Safe_ports port 777    # multiling http
2022/10/13 12:15:38| Processing: acl CONNECT method CONNECT
2022/10/13 12:15:38| Processing: http_access deny !Safe_ports
2022/10/13 12:15:38| Processing: http_access deny CONNECT !SSL_ports
2022/10/13 12:15:38| Processing: http_access allow localhost manager
2022/10/13 12:15:38| Processing: http_access deny manager
2022/10/13 12:15:38| Processing: http_access allow localnet
2022/10/13 12:15:38| Processing: http_access allow localhost
2022/10/13 12:15:38| Processing: http_access deny all
2022/10/13 12:15:38| Processing: http_port 3128
2022/10/13 12:15:38| Processing: cache_effective_user squid
2022/10/13 12:15:38| Processing: cache_effective_group squid
2022/10/13 12:15:38| Processing: coredump_dir /usr/local/squid/var/cache/squid
2022/10/13 12:15:38| Processing: refresh_pattern ^ftp:    1440  20% 10080
2022/10/13 12:15:38| Processing: refresh_pattern ^gopher: 1440  0%  1440
2022/10/13 12:15:38| Processing: refresh_pattern -i (/cgi-bin/|\?) 0  0%  0
2022/10/13 12:15:38| Processing: refresh_pattern .    0 20% 4320
启动 停止squid;第一次启动squid服务时,会自动初始化缓存目录。在没有可用的squid服务脚本的情况下,也可以直接调用squid程序来启动服务,这是需要先进行初始化。
[root@pd001 ~]# squid -z  //-z选项用来初始化缓存表
2022/10/13 12:16:09 kid1| Set Current Directory to /usr/local/squid/var/cache/squid
2022/10/13 12:16:09 kid1| Creating missing swap directories
2022/10/13 12:16:09 kid1| No cache_dir stores are configured.
[root@pd001 ~]# squid //启动squid服务
确认squid服务处于正常监听状态
[root@pd001 ~]# netstat -anpt | grep squid
tcp6       0      0 :::3128                 :::*                    LISTEN      51214/(squid-1)
使用squid服务脚本
为了使用squid服务的启动、停止、重载等操作更加放便,可以编写squid服务脚本,并使用chkconfig和systemctl工具来进行管理。
[root@pd001 ~]# vim /etc/init.d/squid

#!/bin/bash
# chkconfig: 2345 90 25
# config: /etc/squid.conf
# pidfile: /usr/local/squid/var/run/squid.pid
# Description: Squid - Internet Object Cache.
PID="/usr/local/squid/var/run/squid.pid"
CONF="/etc/squid.conf"
CMD="/usr/local/squid/sbin/squid"
case "$1" in
 start)
     netstat -anpt | grep squid &> /dev/null
     if [ $? -eq 0 ]
     then
      echo "squid is running"
       else
      echo "正在启动squid..."
      $CMD
     fi
;;
stop)
    $CMD -k kill &> /dev/null
    rm -rf $PID &> /dev/null
;;
status)
    [ -f $PID ] &> /dev/null
          if [ $? -eq 0]
             then
    netstat -anpt | grep squid
          else
            echo "Squid is not running."
          fi
;;
restart)
    $0 stop &> /dev/null
     echo "正在关闭squid..."
           $0 start &> /dev/null
     echo "正在启动squid..."
;;
reload)
    $CMD -k reconfigure
;;
check)
    $CMD -k parse
;;
*)
    echo "用法: $0 {start | stop | restart | reload | check | status}"
;;
esac


[root@pd001 ~]#chmod +x /etc/init.d/squid
[root@pd001 ~]#chkconfig --add squid  //添加为系统服务
[root@pd001 ~]#systemctl restart squid  //重新启动squid服务
第二步:构建传统代理服务器
1.Squid服务器的配置
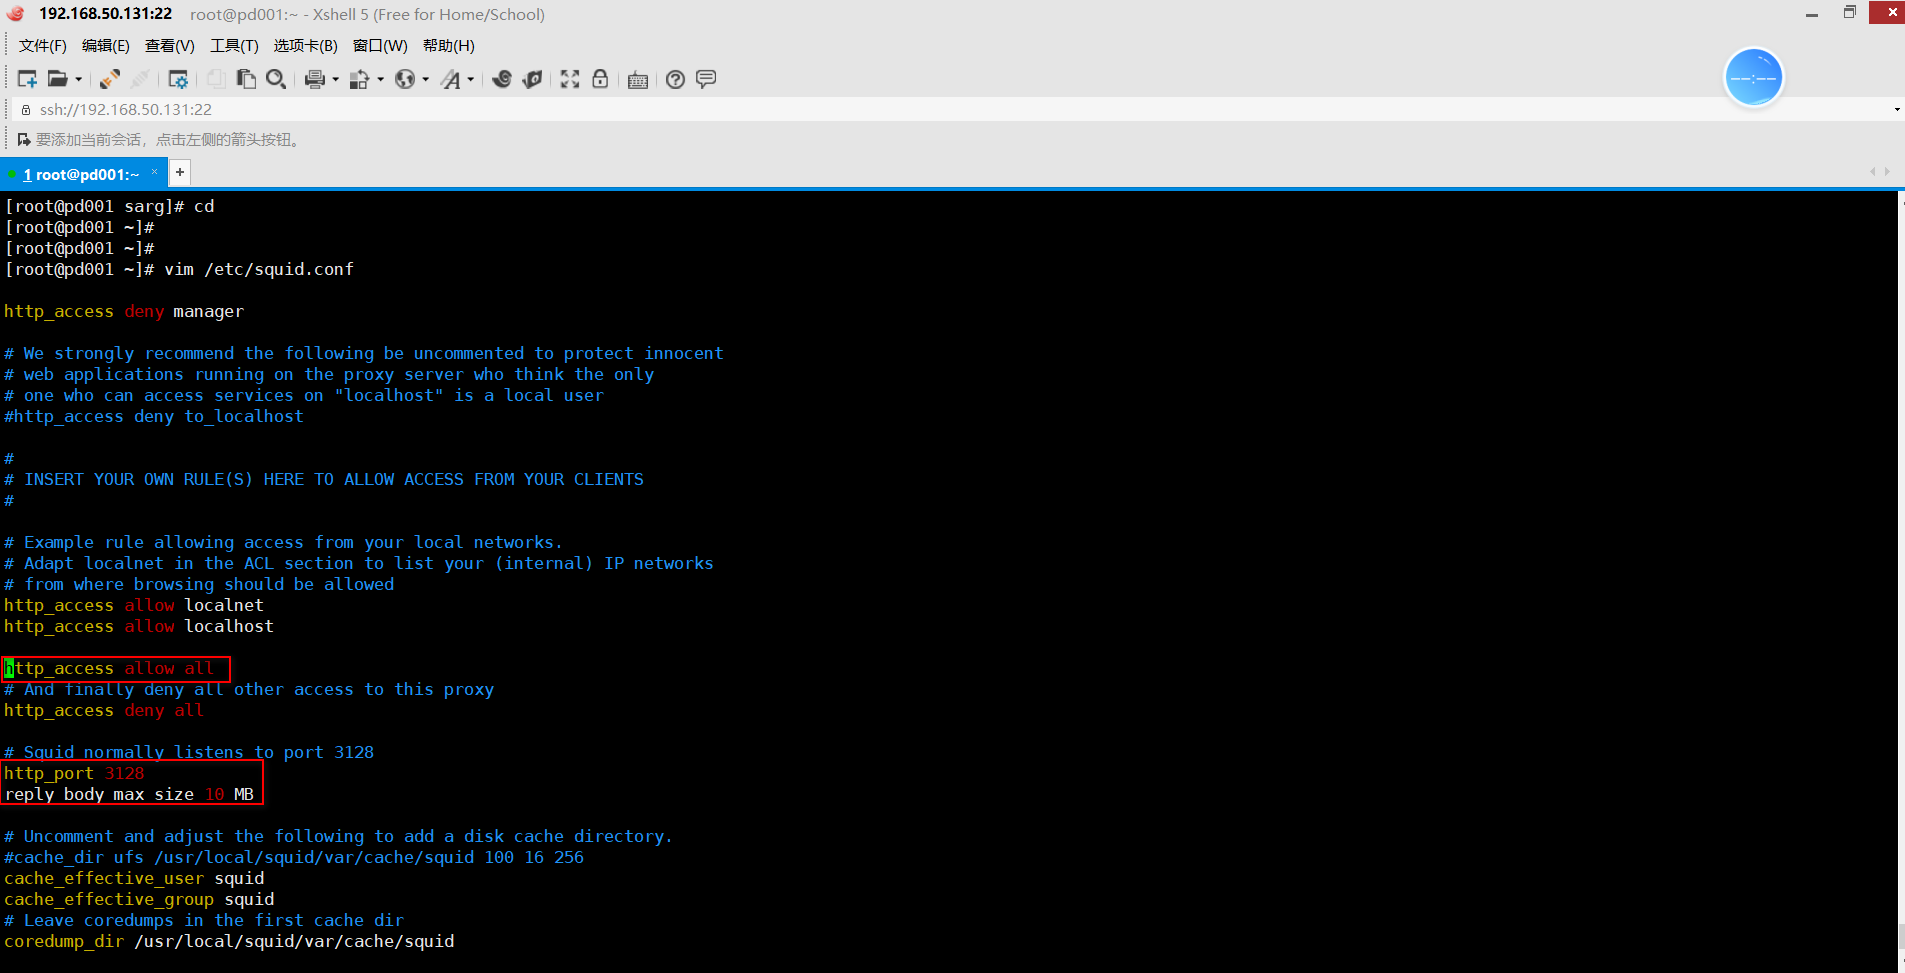
配置Squid实现传统代理服务时,需要注意添加http_accessallowall访问策略,以便允许任意客户机使用代理服务。除此以外,为了限制下载的文件大小,还需要设置reply_body_max_size ]其他各种参数均可保持默认。
修改squidconf配置文件
[root@pd001 ~]# vim /etc/squid.conf
......//省略部分内容
http_port 3128
reply_body_max_size 10 MB  //允许下载最大文件大小(10MB)
http_access allow all   //放在http_access deny all后面
..........//省略部分内容
2.客户机的代理配置
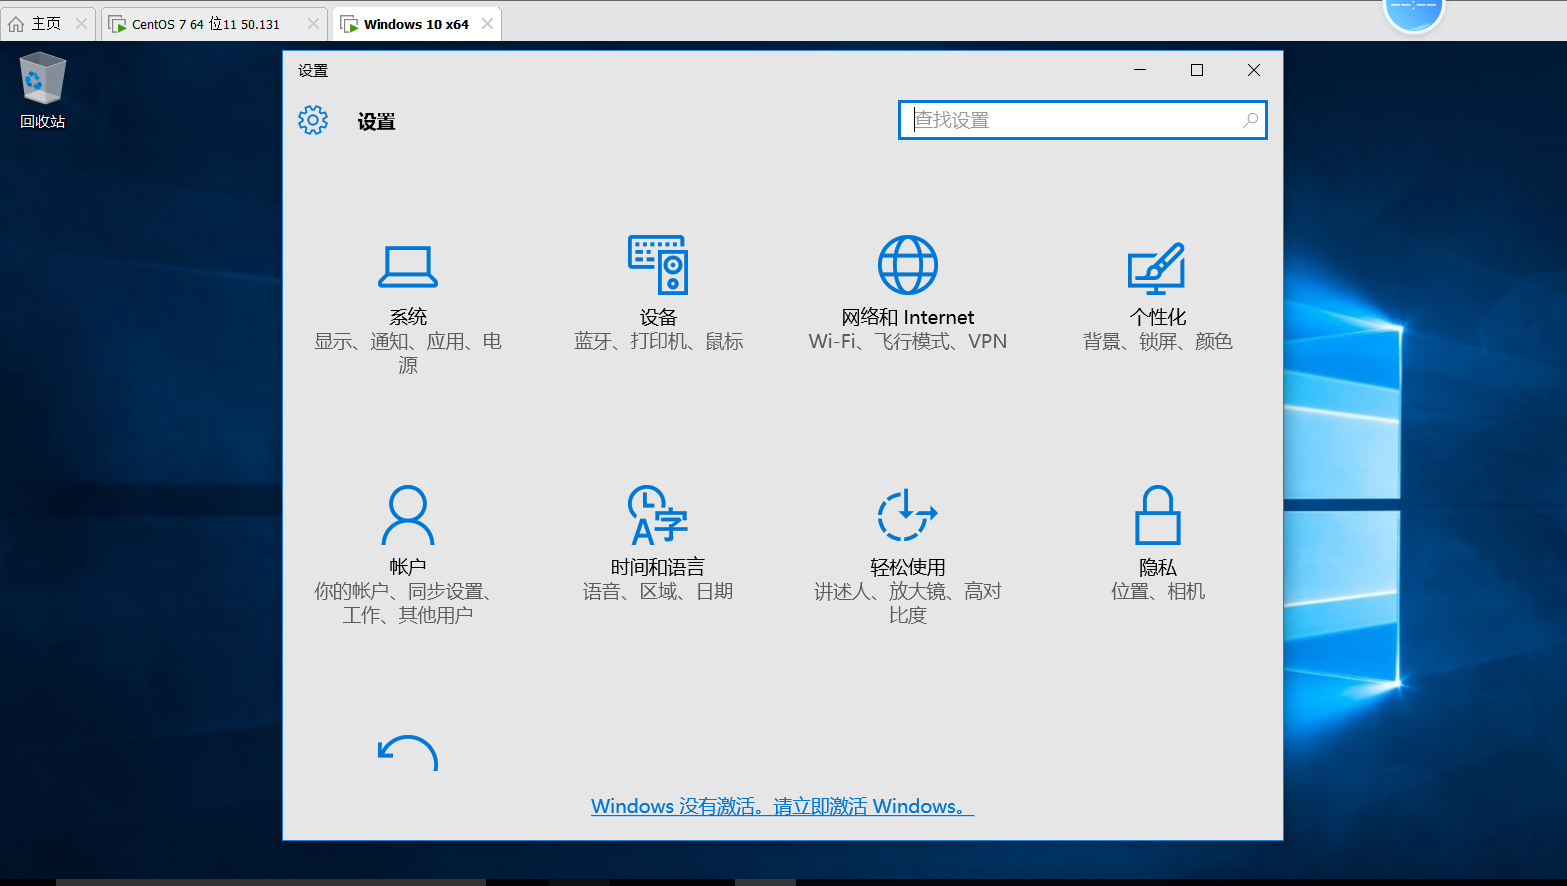
Windows系统设置如下
打开设置,选择网络和internet
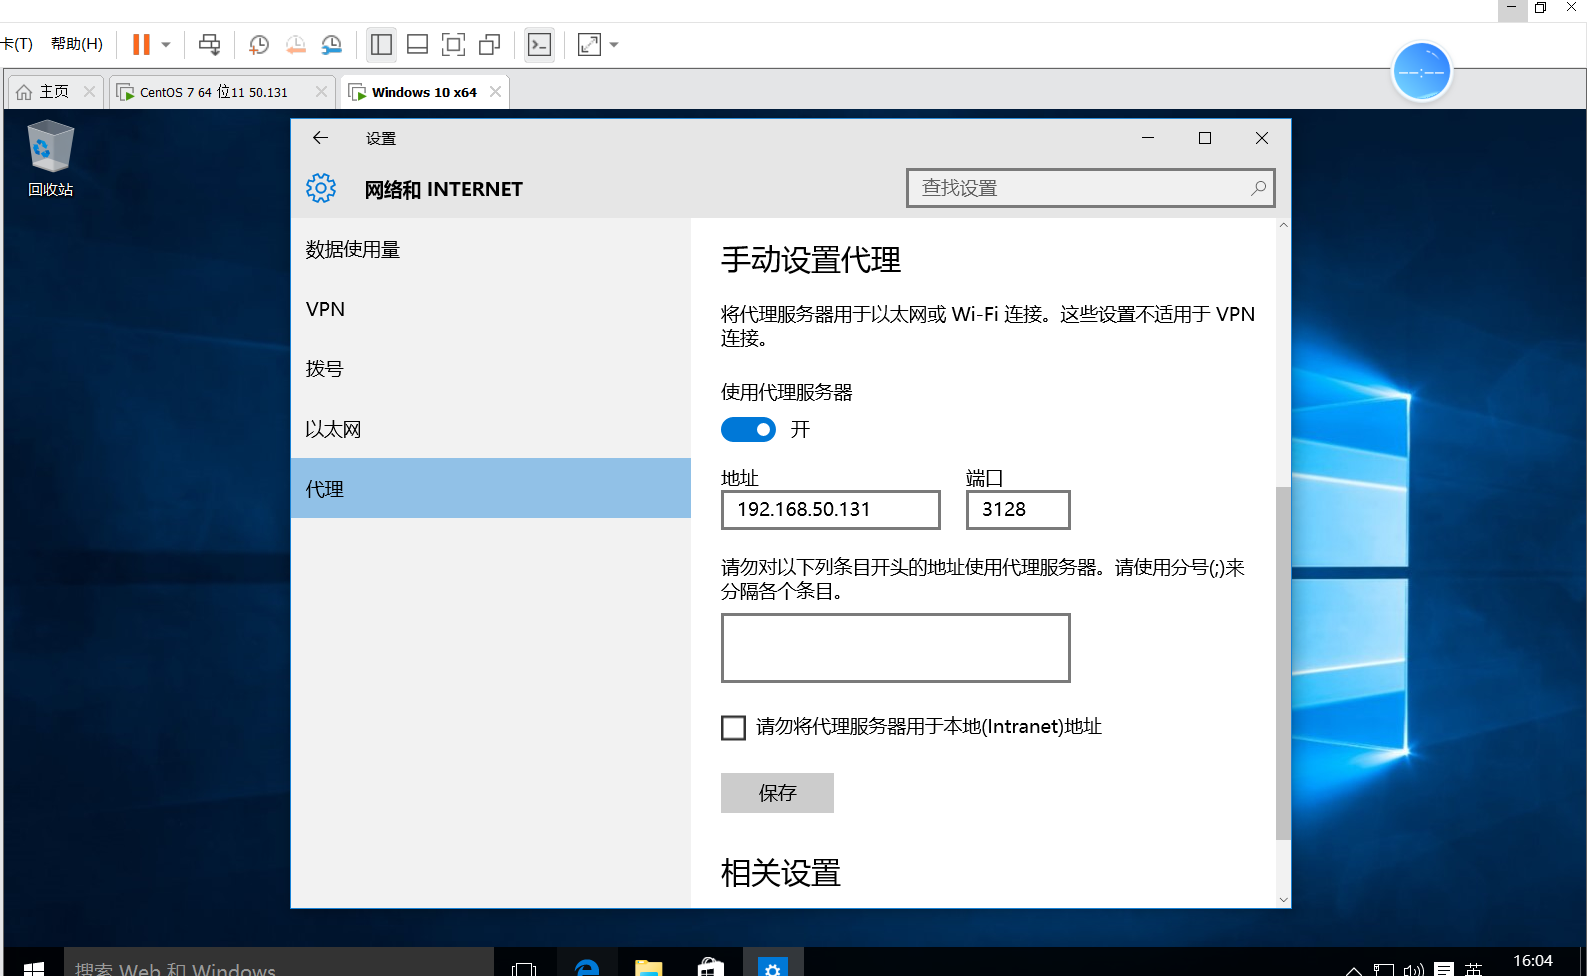
选择代理,将使用代理服务器按钮打开,输入代理服务器地址和端口号,点击保存即可
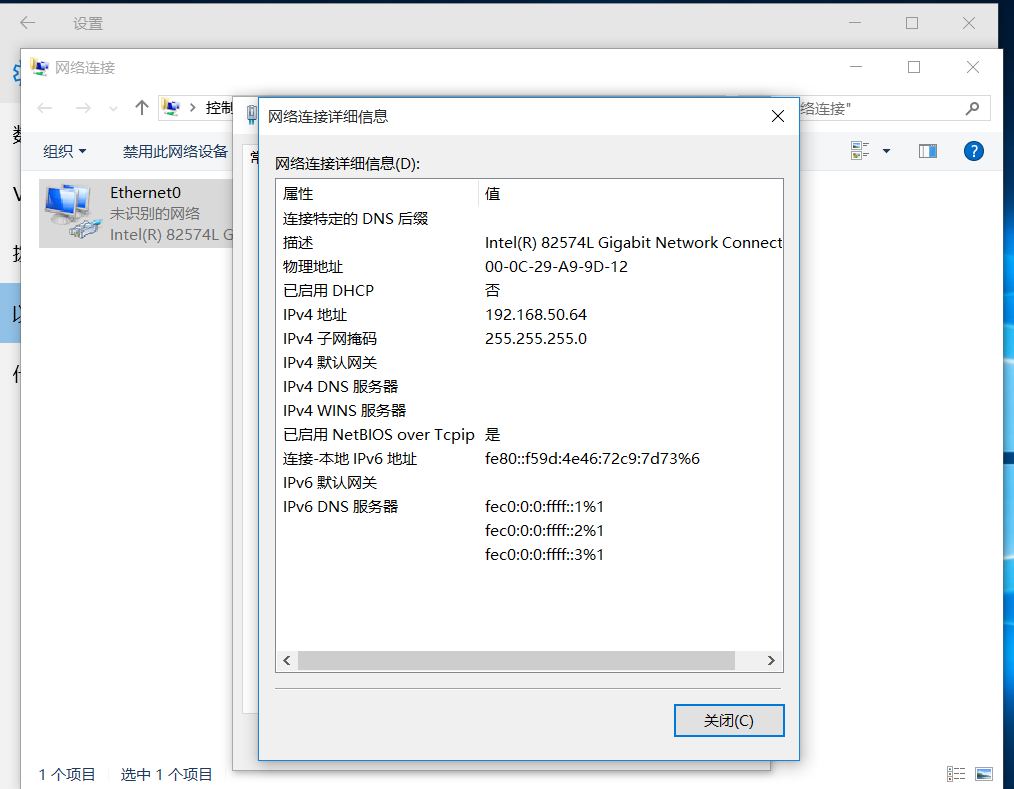
客户机IP地址设置,ip地址与服务器保持同一网段即可,并互相可以ping通,网关和dns服务器为空即可
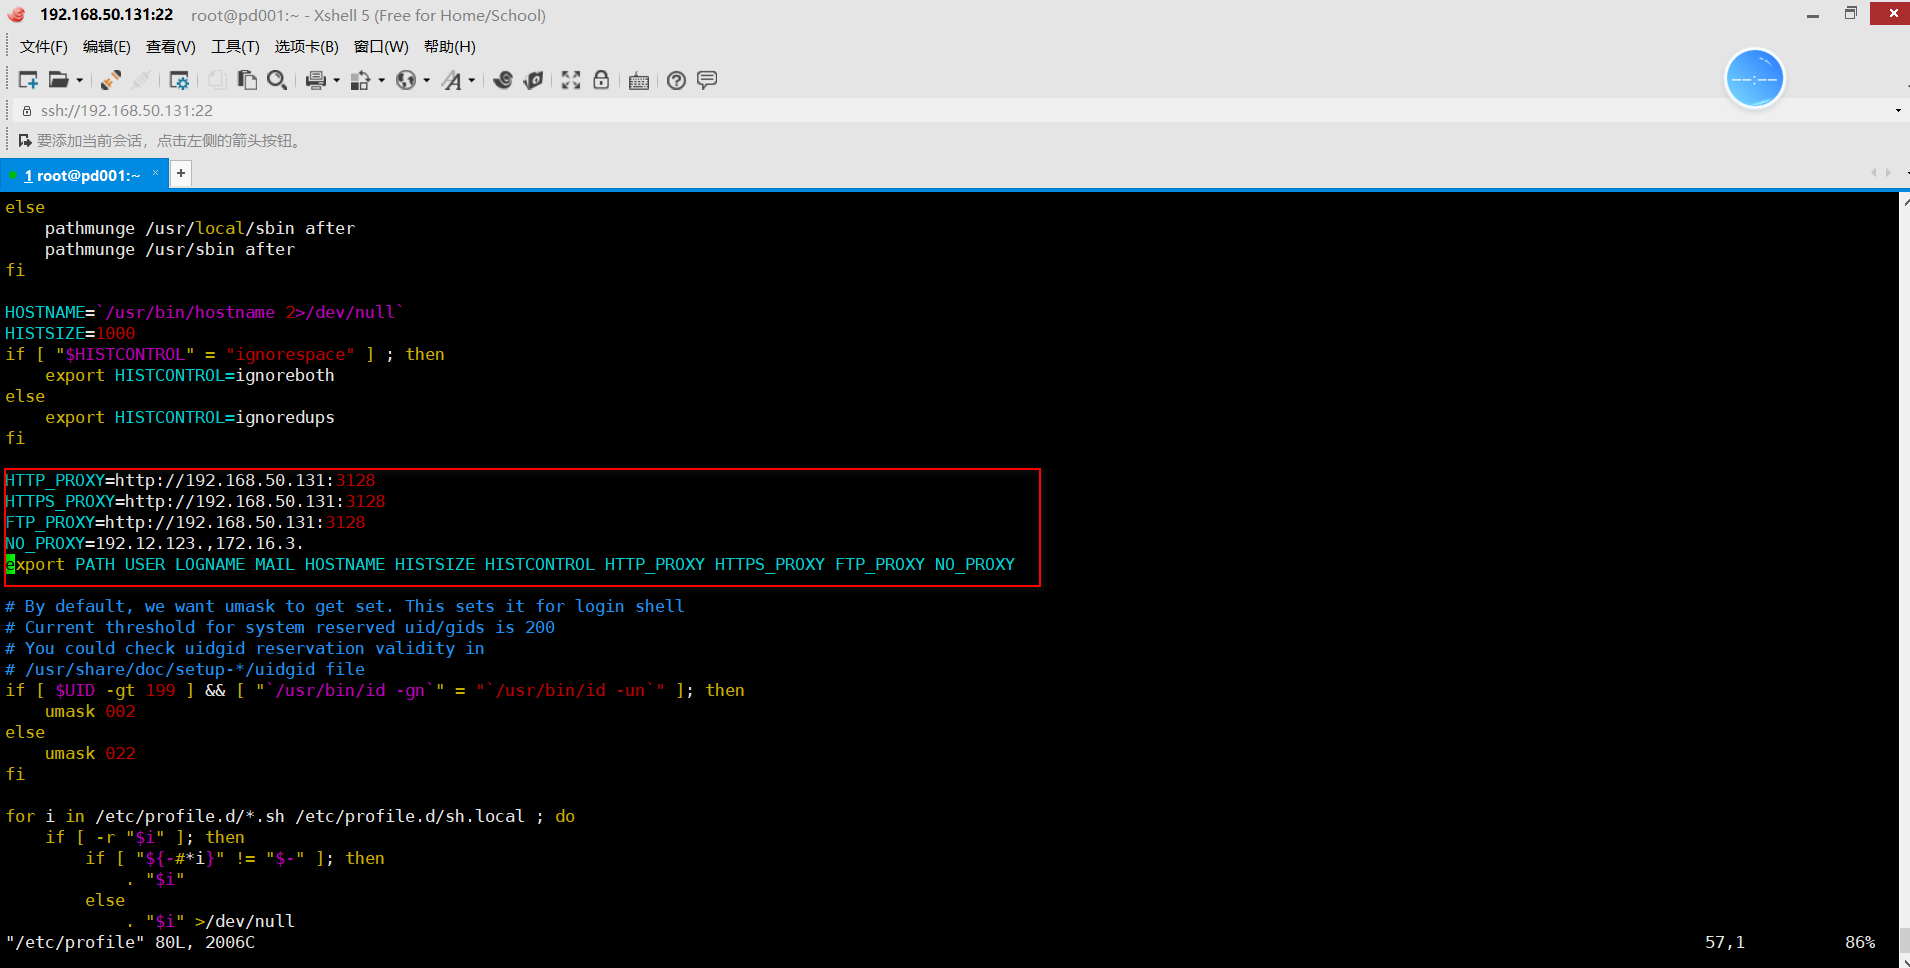
若要在Linux客户机的命令行界面中使用代理服务器(如 elinks网页浏览器、wget下载工具),必须通过环境变量来指定代理服务器的地址、端口等信息。
[root@pd001 ~]# vim /etc/profile

.......//省略部分内容
HTTP_PROXY=http://192.168.50.131:3128 //为使用HTTP协议指定代理
HTTPS_PROXY=http://192.168.50.131:3128  //为使用HTTPS协议指定代理
FTP_PROXY=http://192.168.50.131:3128   //为使用FTP协议指定代理
NO_PROXY=192.12.123.,172.16.3.       //对两个局域网段不使用代理
export PATH USER LOGNAME MAIL HOSTNAME HISTSIZE HISTCONTROL HTTP_PROXY HTTPS_PROXY FTP_PROXY NO_PROXY
.......//省略部分内容

[root@pd001 ~]# source /etc/profile
代理服务验证方法
查看Squid访问日志的新增记录
在Squid代理服务器中,通过跟踪Squid服务的访问日志文件,应该能够发现客户机192.168.50.65访问记录。
[root@pd001 ~]# tail -f /usr/local/squid/var/logs/access.log
1665647508.623  92215 192.168.50.64 TCP_TUNNEL/200 576 CONNECT www.163.com:443 - HIER_DIRECT/113.106.97.219 -
1665647624.566  83524 192.168.50.64 TCP_TUNNEL/200 1102 CONNECT www.163.com:443 - HIER_DIRECT/113.106.97.217 -
1665647734.568  66584 192.168.50.64 TCP_TUNNEL/200 545 CONNECT www.163.com:443 - HIER_DIRECT/113.106.97.217 -
1665647887.470  90050 192.168.50.64 TCP_TUNNEL/200 1133 CONNECT www.163.com:443 - HIER_DIRECT/113.106.97.216 -
1665648018.503  90038 192.168.50.64 TCP_TUNNEL/200 1133 CONNECT www.163.com:443 - HIER_DIRECT/113.106.97.217 -
查看Web访问日志的新增记录
在被访问的Web服务器中,通过跟踪httpd服务的访问日志文件,应该能够发现来自代理服务器192.168.50.131的访问记录。这说明当客户机使用代理以后,Web服务器并不知道客户机的真实IP地址,因为实际上是由代理服务器替它在访问。
[root@pd001 ~]# tail -f /var/log/httpd/access_log
192.168.50.131 - - [13/Oct/2022:15:02:24 +0800] "GET /sarg/ HTTP/1.1" 200 5424 "-" "Mozilla/5.0 (Windows NT 10.0; Win64; x64) AppleWebKit/537.36 (KHTML, like Gecko) Chrome/42.0.2311.135 Safari/537.36 Edge/12.10240"
192.168.50.131 - - [13/Oct/2022:15:02:24 +0800] "GET /sarg/images/sarg.png HTTP/1.1" 200 7153 "http://192.168.50.131/sarg/" "Mozilla/5.0 (Windows NT 10.0; Win64; x64) AppleWebKit/537.36 (KHTML, like Gecko) Chrome/42.0.2311.135 Safari/537.36 Edge/12.10240"
192.168.50.131 - - [13/Oct/2022:15:02:24 +0800] "GET /sarg/ HTTP/1.1" 304 - "-" "Mozilla/5.0 (Windows NT 10.0; Win64; x64) AppleWebKit/537.36 (KHTML, like Gecko) Chrome/42.0.2311.135 Safari/537.36 Edge/12.10240"
第三步:Squid日志分析
1.安装GD库
[root@pd001 ~]# yum -y install gd gd-devel
2.安装SARG
[root@pd001 ~]# mkdir /usr/local/sarg
[root@pd001 ~]# tar zxf sarg-2.3.7.tar.gz
[root@pd001 ~]# cd sarg-2.3.7/
[root@pd001 sarg-2.3.7]#  ./configure --prefix=/usr/local/sarg --sysconfdir=/etc/sarg --enable-extraprotection && make && make install
3.配置
[root@pd001 ~]# cd /etc/sarg/
[root@pd001 sarg]# vim sarg.conf
.......//省略部分内容
以下为配置文件修改内容
ccess_log/usr/local/squid/var/logs/access.log//指定squid的访问日志文
title "Squid User Access Reports"//网页标题
output_dir /var/www/html/sarg //sarg报告的输出目录
user ip no //使用用户名显示
exclude_hosts /usr/local/sarg/noreport //指定不计入排序的站点列表文件
topuser sort field connect  reverse//在top排序中,指定连接次数、访问字节数,采用降序排列,升序将 reverse换成normal
user sort field connect reverse //对于用户访问记录,连接次数按降序排列
overwrite report no //当那个日期报告已经存在,是否覆盖报告
mail utility mailq.postfix //发送邮件报告的命令
charset utf-8 //使用字符集
weekdays 0-6//指定top排序时的星期周期,o为周日
hours 9-12,14-16,18-20 //指定top排序时的时间周期
www document root/var/www/html //网页根目录
4.运行
上述文件中,添加了不计入排序的站点,需要存在下面这个文件。
touch /usr/local/sarg/noreport
直接执行sarg即可启动一次记录,建议设置符号链接,然后执行sarg,会看到提示信息。
[root@pd001 sarg]# sarg
SARG: 纪录在文件: 706, reading: 100.00%
SARG: 成功的生成报告在 /var/www/html/sarg/2022Oct13-2022Oct13

[root@pd001 sarg]# yum -y install httpd  //如果http的服务已经安装和开启,忽略以下配置
[root@pd001 sarg]# systemctl start httpd.service
[root@pd001 sarg]# systemctl enable httpd.service
[root@pd001 sarg]# systemctl status httpd.service
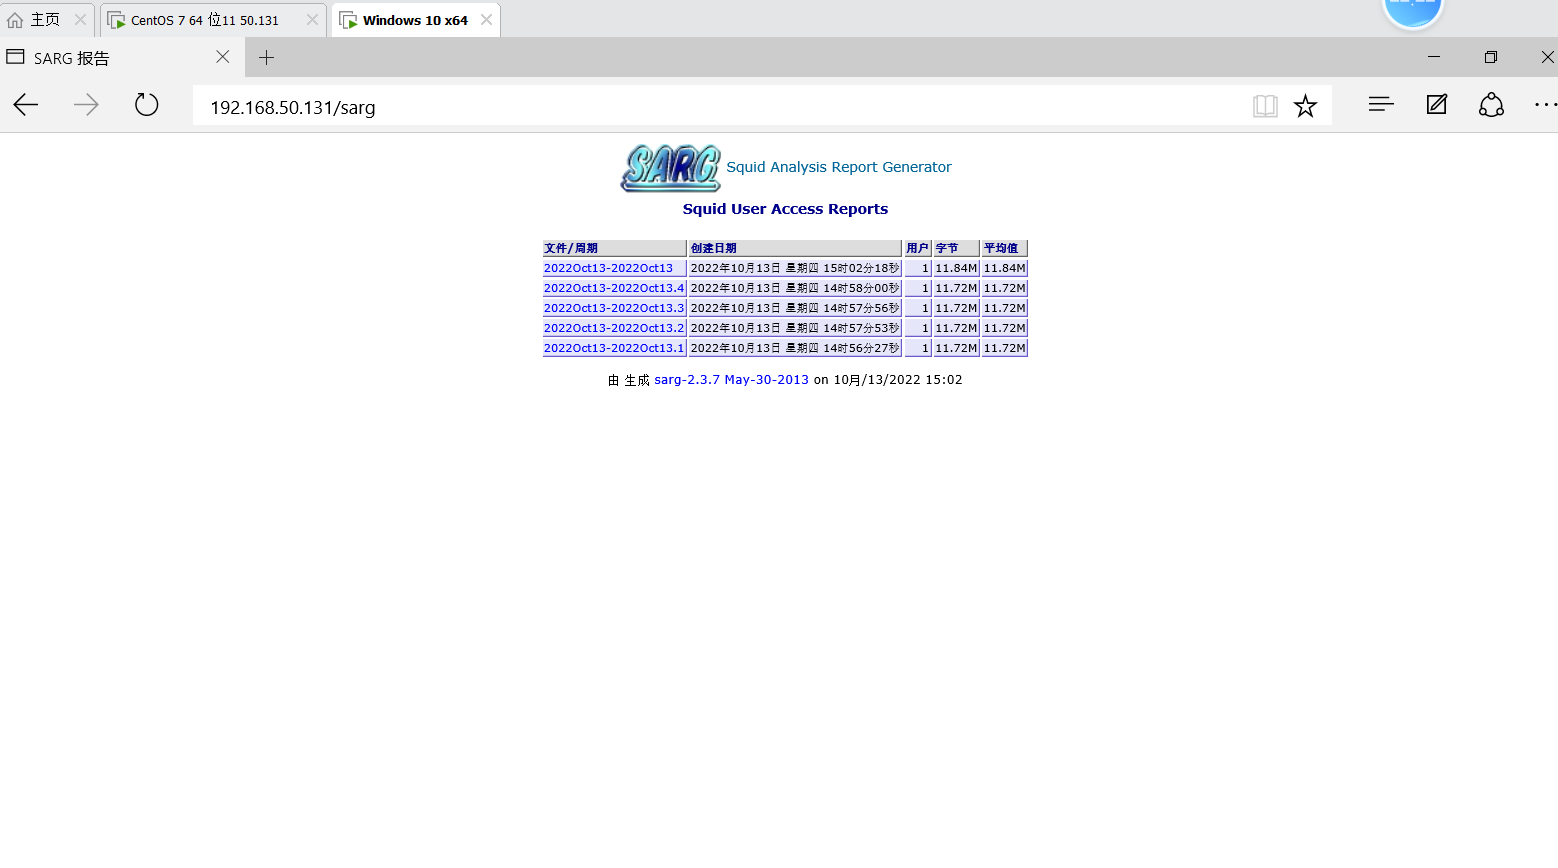
5.验证
在sargconf配置中可设置字体、颜色等信息,方便查询。多次执行sarg后,在客户端上访问sarg/目录,可看到SARG报告如图 所示
6.计划任务脚本在《Linux高级管理》p222


