
在进行 Spring MVC 项目开发时,一般会使用 EL 表达式和 JSTL 标签来完成页面视图的开发。其实 Spring 也有自己的一套表单标签库,通过 Spring 表单标签,可以很容易地将模型数据中的命令对象绑定到 HTML 表单元素中。下面我们就通过一个示例来演示该标签库的用法。
首先和 JSTL 标签的使用方法相同,在使用 Spring 表单标签之前,必须在 JSP 页面开头处声明 taglib 指令,指令代码如下。
<%@ taglib prefix="fm" uri="http://www.springframework.org/tags/form"%>
常用的 Spring 表单标签如下表所示。
名称 |
作用 |
form |
渲染表单元素 |
input |
输入框组件标签,渲染 <input type="text"/> 元素 |
password |
密码框组件标签,渲染 <input type="password"/> 元素 |
hidden |
隐藏框组件标签,渲染 <input type="hidden"/> 元素 |
textarea |
多行输入框组件标签,渲染 textarea 元素 |
checkbox |
复选框组件标签,渲染一个 <input type="checkbox"/> 元素 |
checkboxes |
渲染多个 <input type="checkbox"/> 元素 |
radiobutton |
单选框组件标签,渲染一个 <input type="radio"/> 元素 |
radiobuttons |
渲染多个 <input type="radio"/> 元素 |
select |
下拉列表组件标签,渲染一个选择元素 |
option |
渲染一个选项元素 |
options |
渲染多个选项元素 |
errors |
显示表单数据校验所对应的错误信息 |
以上标签基本都拥有以下属性。
- path:属性路径,表示表单对象属性,如 userName、userCode 等。
- cssClass:表单组件对应的 CSS 样式类名。
- cssErrorClass:当提交表单后报错(服务端错误),采用的 CSS 样式类。
- cssStyle:表单组件对应的 CSS 样式。
- htmlEscape:绑定的表单属性值是否要对 HTML 特殊字符进行转换,默认为 true。
示例
下面以 <fm:form> 表单标签为例,模仿添加用户信息。
1. 创建实体类
创建实体类 user,代码如下。
package net.biancheng.po;

public class User {
    private String name;
    private Integer age;
    private Double height;

    /** 省略setter和getter方法*/
}
2. 创建页面
创建 addUser.jsp,代码如下。
<%@ page language="java" contentType="text/html; charset=UTF-8"
    pageEncoding="UTF-8"%>
<%@ taglib prefix="fm" uri="http://www.springframework.org/tags/form"%>
<!DOCTYPE html PUBLIC "-//W3C//DTD HTML 4.01 Transitional//EN" "http://www.w3.org/TR/html4/loose.dtd">
<html>
<head>
<meta http-equiv="Content-Type" content="text/html; charset=UTF-8">
<title>添加用户</title>
</head>
<body>
    <fm:form method="post" modelAttribute="user" action="${pageContext.request.contextPath }/showuser">
        用户名:<fm:input path="name"/>
        <br />
        年龄:<fm:input path="age"/>
        <br />
        身高:<fm:input path="height"/>
        <br />
        <input type="submit" value="保存" />
    </fm:form>
</body>
</html>
<fm:form> 标签的 modelAttribute 属性用于指定绑定的模型属性。默认从模型中尝试取名为“command”的表单对象,若不存在此表单对象,将会报错。所以一般情况下会指定 modelAttribute 属性。
此外,表单组件标签页拥有 HTML 标签的各种属性,如 id、onclick 等,都可以根据需要灵活使用。
创建显示页面 showUser.jsp,代码如下。
<%@ page language="java" contentType="text/html; charset=UTF-8"
    pageEncoding="UTF-8"%>
<!DOCTYPE html PUBLIC "-//W3C//DTD HTML 4.01 Transitional//EN" "http://www.w3.org/TR/html4/loose.dtd">
<html>
<head>
<meta http-equiv="Content-Type" content="text/html; charset=UTF-8">
<title>用户信息</title>
</head>
<body>
    您创建的用户信息如下:
    <br />
    <!-- 使用EL表达式取出model中的user信息 -->
    用户名:${user.name }
    <br /> 年龄:${user.age }
    <br /> 身高:${user.height }
</body>
</html>
3. 创建控制器类
创建 UserController,代码如下。
package net.biancheng.controller;


import javax.servlet.http.HttpServletRequest;
import javax.servlet.http.HttpSession;

import org.springframework.stereotype.Controller;
import org.springframework.web.bind.annotation.ModelAttribute;
import org.springframework.web.bind.annotation.PathVariable;
import org.springframework.web.bind.annotation.RequestMapping;
import org.springframework.web.bind.annotation.RequestMethod;

import net.biancheng.po.User;

@Controller
public class UserController {

    @RequestMapping(value = "/addUser", method = RequestMethod.GET)
    public String add(@ModelAttribute("user") User user) {

        return "addUser";
    }

    @RequestMapping(value = "/showuser", method = RequestMethod.POST)
    public String showuser(User user, HttpSession session, HttpServletRequest request) {

        return "showUser";
    }
}
4. 测试运行
访问地址:http://localhost:8080/springmvcDemo2/addUser,运行结果如下图所示。
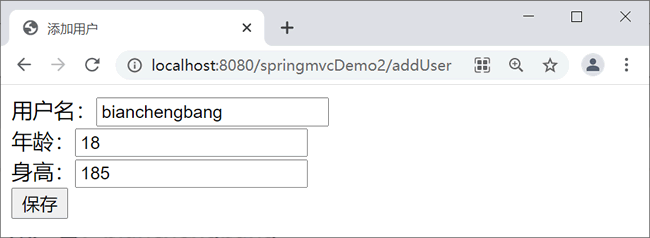
添加用户

显示添加用户信息