
(21-测试报告插件allure-pytest如何使用?)
1 Allure简介
详细内容可以参考官方文档:https://docs.qameta.io/allure-report/; 
Allure是一个多语言测试报告工具;- 可以使用
Web形式显示报告内容; - 开发/质量保证角度,可以将测试失败划分为bug和损坏的测试,还可以配置log,step,fixture,attachments,timings,历史记录以及与TMS的集成以及Bug跟踪系统;
- 管理人员角度,Allure提供了一个清晰的“全局”,涵盖了已涵盖的功能,缺陷聚集的位置,执行时间表的外观以及许多其他方便的事情;
- Allure的模块化和可扩展性确保您始终能够微调某些东西,以使Allure更适合您。
重点:拓展功能需要在测试用例集上加装饰器。(后续文章再学习)
2 环境配置
2.1 allure-pytest插件安装
pip3 install allure-pytest
C:\Users\Administrator>pip3 install allure-pytest
Looking in indexes: https://pypi.tuna.tsinghua.edu.cn/simple
Requirement already satisfied: allure-pytest in d:\python37\lib\site-packages (2.8.12)
Requirement already satisfied: six>=1.9.0 in d:\python37\lib\site-packages (from allure-pytest) (1.15.0)
Requirement already satisfied: allure-python-commons==2.8.12 in d:\python37\lib\site-packages (from allure-pytest) (2.8.12)
Requirement already satisfied: pytest>=4.5.0 in d:\python37\lib\site-packages (from allure-pytest) (6.2.4)
Requirement already satisfied: attrs>=16.0.0 in d:\python37\lib\site-packages (from allure-python-commons==2.8.12->allure-pytest) (20.3.0)
Requirement already satisfied: pluggy>=0.4.0 in d:\python37\lib\site-packages (from allure-python-commons==2.8.12->allure-pytest) (0.13.1)
Requirement already satisfied: importlib-metadata>=0.12 in d:\python37\lib\site-packages (from pytest>=4.5.0->allure-pytest) (2.1.1)
Requirement already satisfied: iniconfig in d:\python37\lib\site-packages (from pytest>=4.5.0->allure-pytest) (1.1.1)
Requirement already satisfied: py>=1.8.2 in d:\python37\lib\site-packages (from pytest>=4.5.0->allure-pytest) (1.10.0)
Requirement already satisfied: packaging in d:\python37\lib\site-packages (from pytest>=4.5.0->allure-pytest) (20.8)
Requirement already satisfied: colorama in d:\python37\lib\site-packages (from pytest>=4.5.0->allure-pytest) (0.4.4)
Requirement already satisfied: atomicwrites>=1.0 in d:\python37\lib\site-packages (from pytest>=4.5.0->allure-pytest) (1.4.0)
Requirement already satisfied: toml in d:\python37\lib\site-packages (from pytest>=4.5.0->allure-pytest) (0.10.2)
Requirement already satisfied: zipp>=0.5 in d:\python37\lib\site-packages (from importlib-metadata>=0.12->pytest>=4.5.0->allure-pytest) (1.2.0)
Requirement already satisfied: pyparsing>=2.0.2 in d:\python37\lib\site-packages (from packaging->pytest>=4.5.0->allure-pytest) (2.4.7)
2.2 pytest安装
pip3 install pytest
- 这个不多说了,之前已经安装过了。
2.3 allure文件下载
- 下载地址:https://github.com/allure-framework/allure2/releases;
- allure是一个命令行工具;
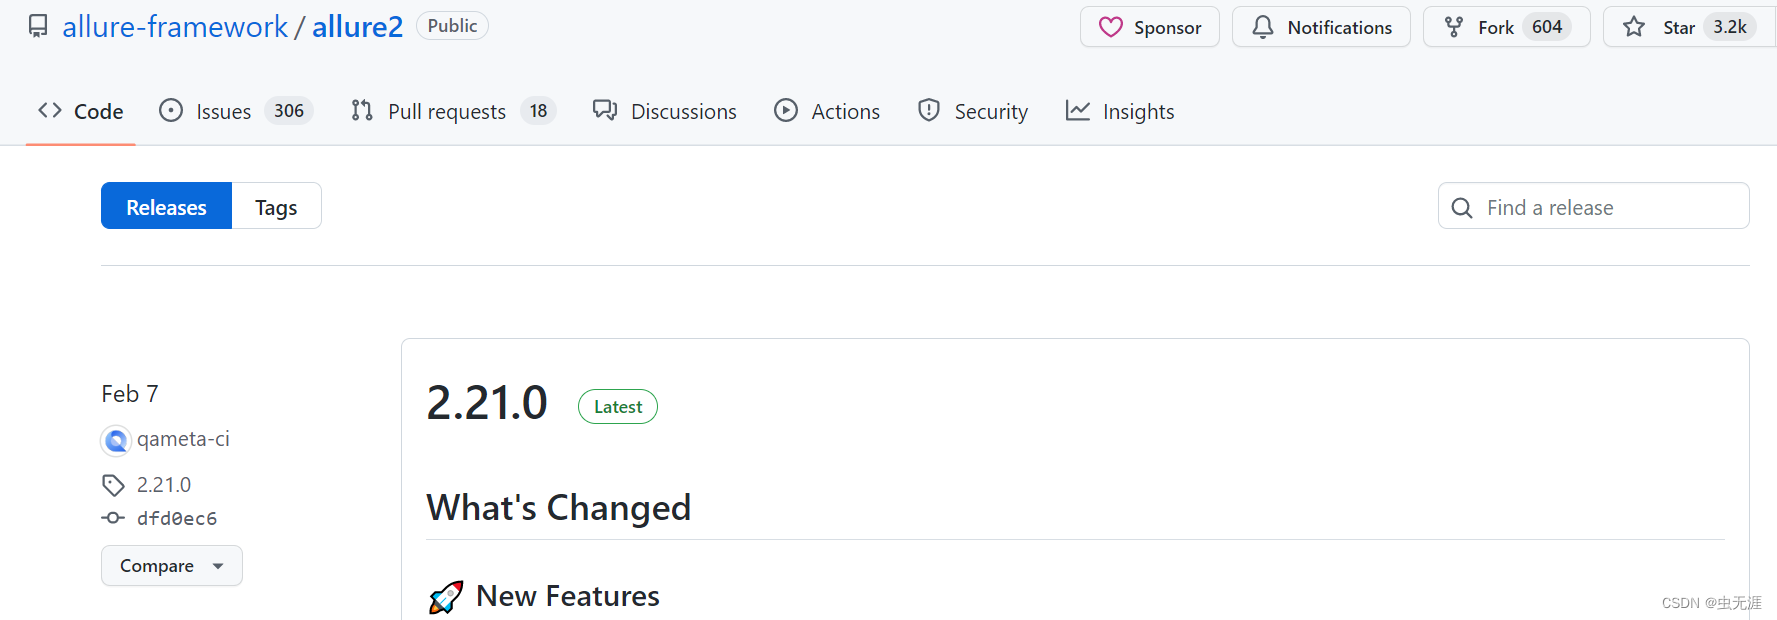
- 往下找,找到下载链接,这里使用的
Windows操作系统,所以下载zip文件: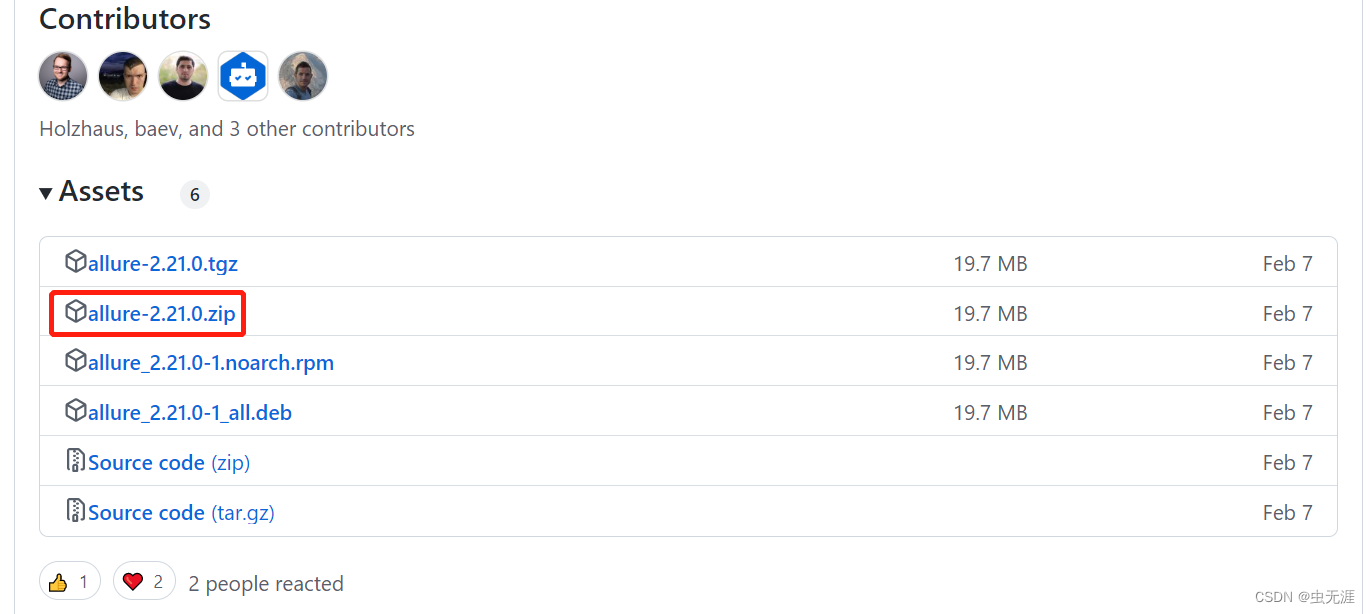
- 如果以上下载比较慢,可以使用以下地址:https://repo.maven.apache.org/maven2/io/qameta/allure/allure-commandline/


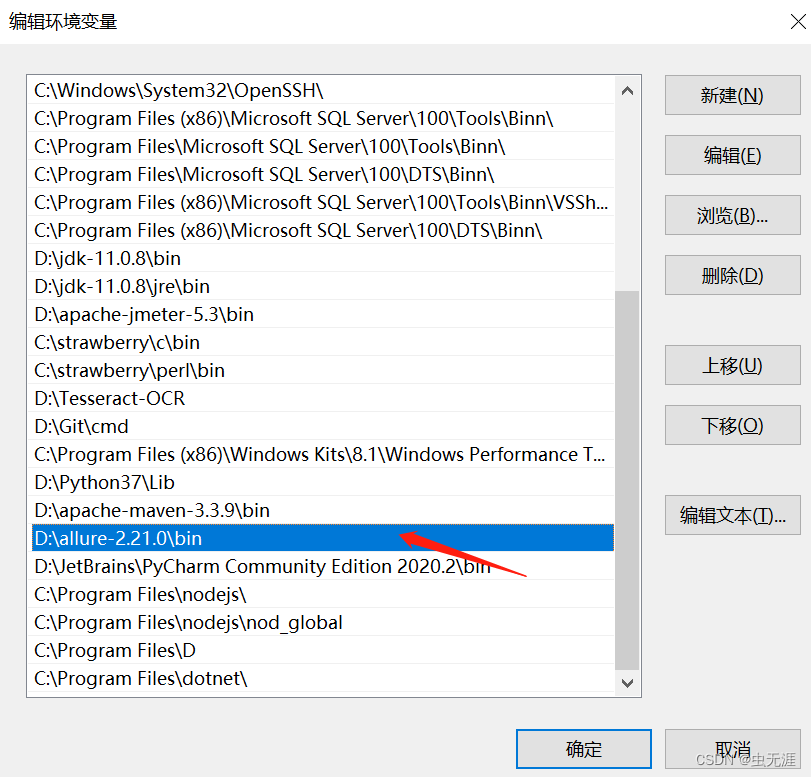
2.4 allure环境变量配置
- 下载后解压到本地即可,比如:


D:\allure-2.21.0\bin
- 然后把以上路径添加到系统环境变量中:

2.5 配置java环境
- 因为allure是依赖java环境的,所以还需要配置java变量;
- 详细java环境配置可以直接网上搜索即可,或者查看本文有关java的配置: Jmeter安装配置详细教程。
3 查看allure版本
allure --version
C:\Users\Administrator>allure --version
2.13.2
4 运行allure
4.1 测试用例
# -*- coding:utf-8 -*-
# 作者:虫无涯
# 日期:2023/3/20
# 文件名称:test_xxx.py
# 作用:示例

import pytest
import time

class TestCase01():
    def test_case_01(self):
        time.sleep(1)
        print("case01$$$$$$$$$$$$$$$$$$$$$")

    def test_case_02(self):
        time.sleep(1)
        print("case02$$$$$$$$$$$$$$$$$$$$$")

    def test_case_03(self):
        time.sleep(1)
        print("case03$$$$$$$$$$$$$$$$$$$$$")

    def test_case_04(self):
        time.sleep(1)
        print("case04$$$$$$$$$$$$$$$$$$$$$")

    def test_case_05(self):
        time.sleep(1)
        print("case05$$$$$$$$$$$$$$$$$$$$$")

    def test_case_06(self):
        time.sleep(1)
        print("case06$$$$$$$$$$$$$$$$$$$$$")

class TestCase02():
    def test_case_07(self):
        time.sleep(1)
        print("case07$$$$$$$$$$$$$$$$$$$$$")

    def test_case_08(self):
        time.sleep(1)
        print("case08$$$$$$$$$$$$$$$$$$$$$")

    def test_case_09(self):
        time.sleep(1)
        print("case08$$$$$$$$$$$$$$$$$$$$$")


if __name__ == '__main__':
    pytest.main(["-s", "test_xxx.py"])
4.1 执行方法
- 执行
pytest -n auto --alluredir=xxx/xxx/xxx来运行查看测试结果,其中--alluredir是指定报告存放的路径,比如:
pytest -n auto --alluredir=allure
- 我只运行以上代码,所以我指定了要运行的脚本为:
test_xxx.py,报告存放路径在当前脚本的路径:
pytest -n auto --alluredir=allure test_xxx.py
- 运行:
gw0 [9] / gw1 [9] / gw2 [9] / gw3 [9] / gw4 [9] / gw5 [9] / gw6 [9] / gw7 [9]
.........                                                                                               [100%]
============================================= 9 passed in 4.66s ==============================================
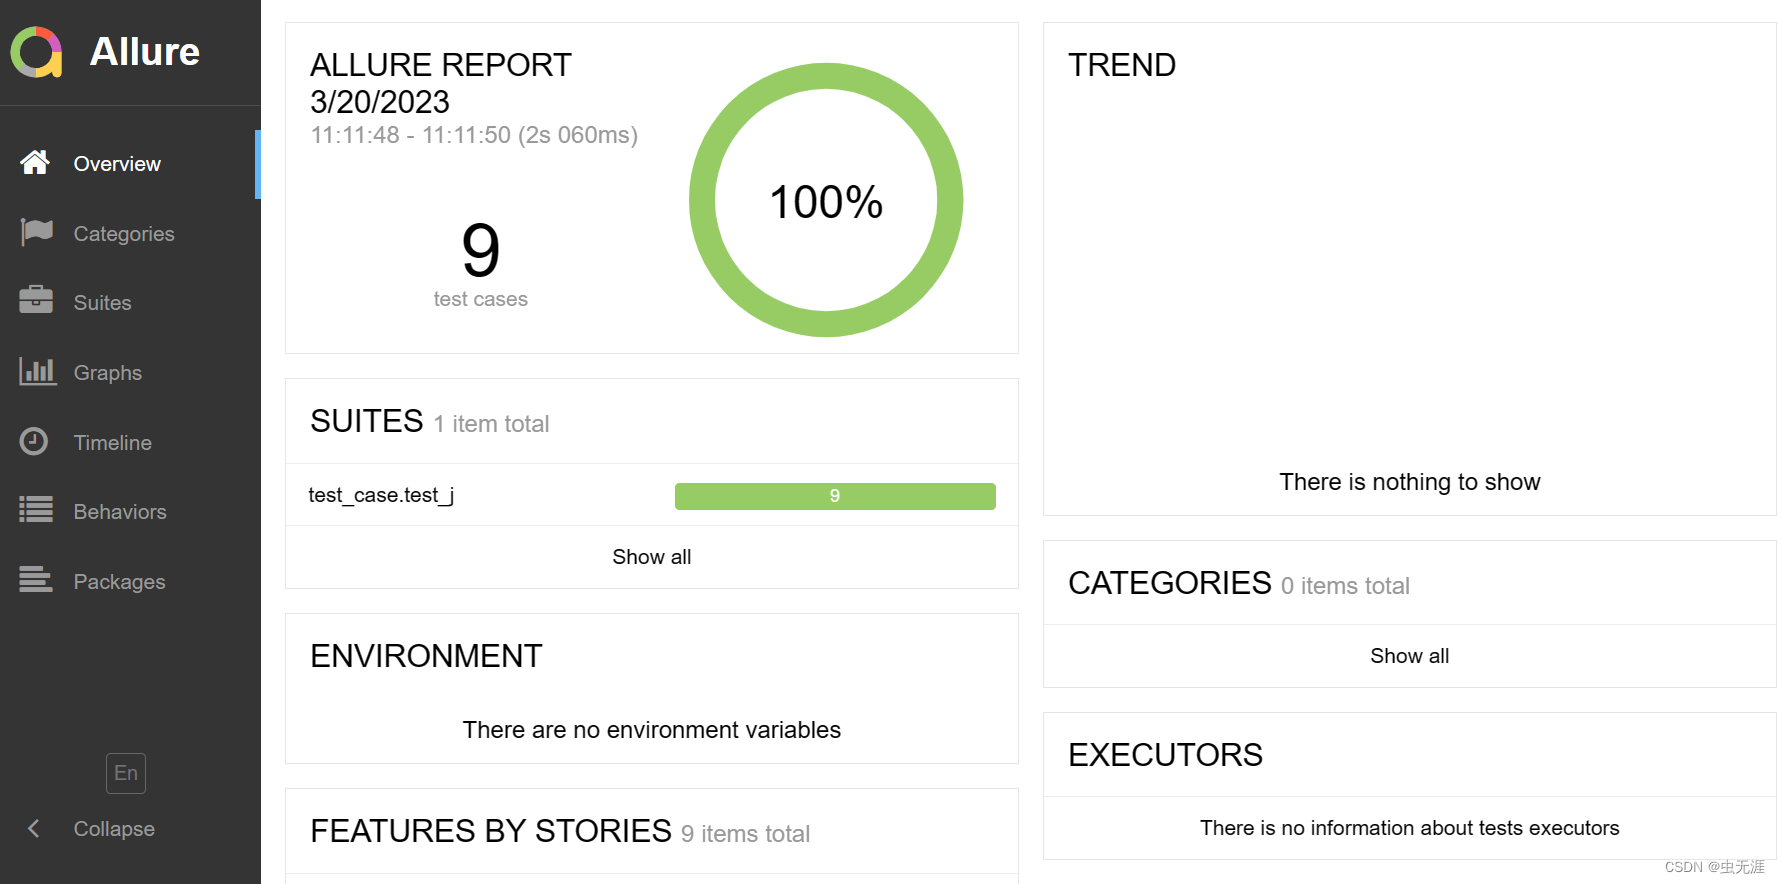
4.3 报告查看方法
- 运行完成后在
test_xxx.py的相同路径下,生成一个allure的文件夹:

- 可以看到有很多文件,我们需要使用
allure命令来显示测试报告:

allure serve allure
(venv) F:\pytest_study\test_case\test_j>allure serve allure
Generating report to temp directory...
Report successfully generated to C:\Users\ADMINI~1\AppData\Local\Temp\743714976960418009\allure-report
Starting web server...
2023-03-20 11:16:28.270:INFO::main: Logging initialized @4392ms to org.eclipse.jetty.util.log.StdErrLog
Server started at <http://172.16.1.33:13959/>. Press <Ctrl+C> to exit
- 使用以上命令会自动打开报告,如下:

4.4 指定报告生成的端口
- 上边的运行方式,生成的端口是自动的随机的,那如何生成指定端口呢?如下:
allure serve -p 8888 allure
4.5 切换报告语言


4.6 查看报告重要信息
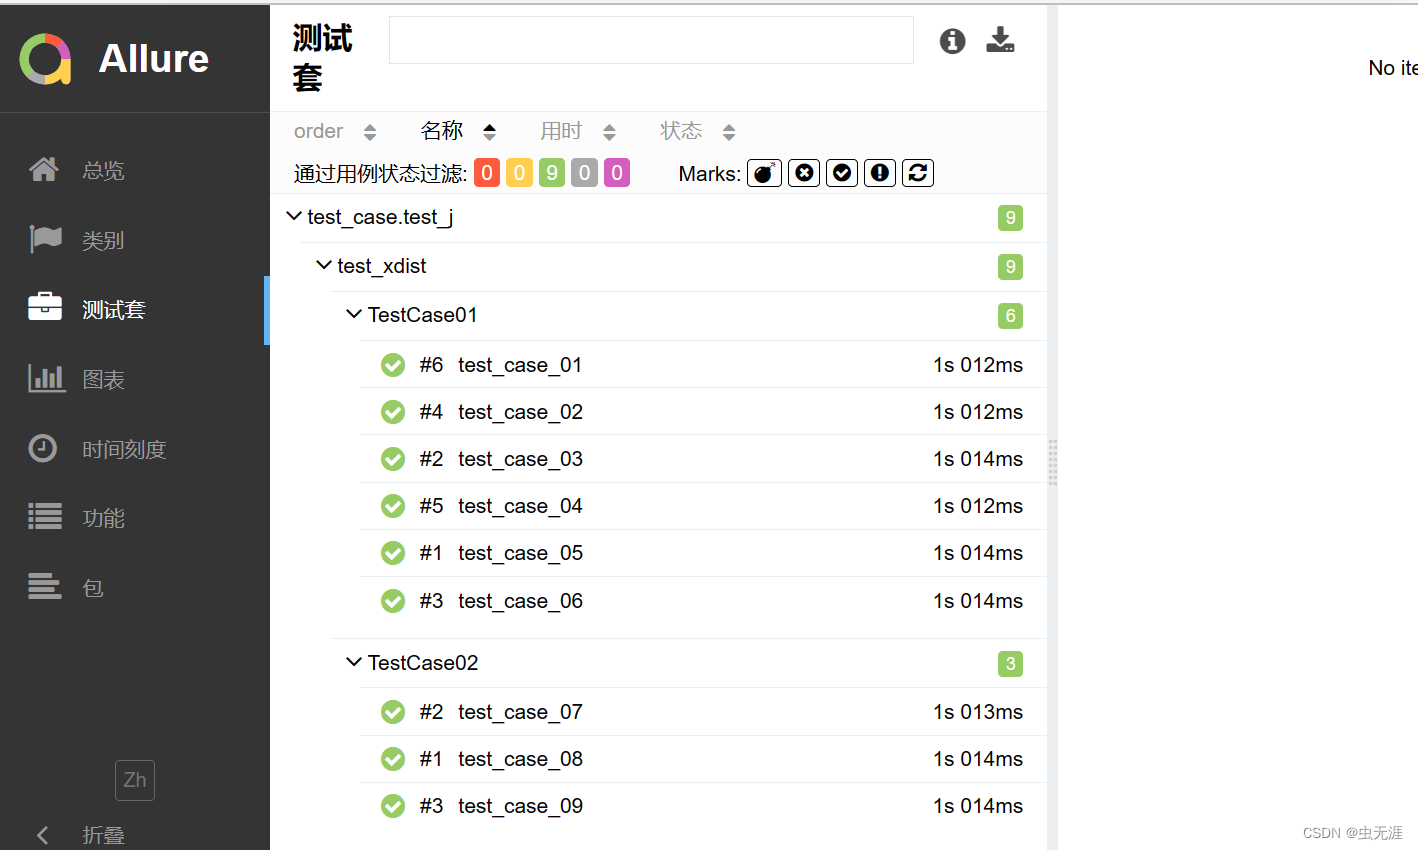
- 查看测试套件:
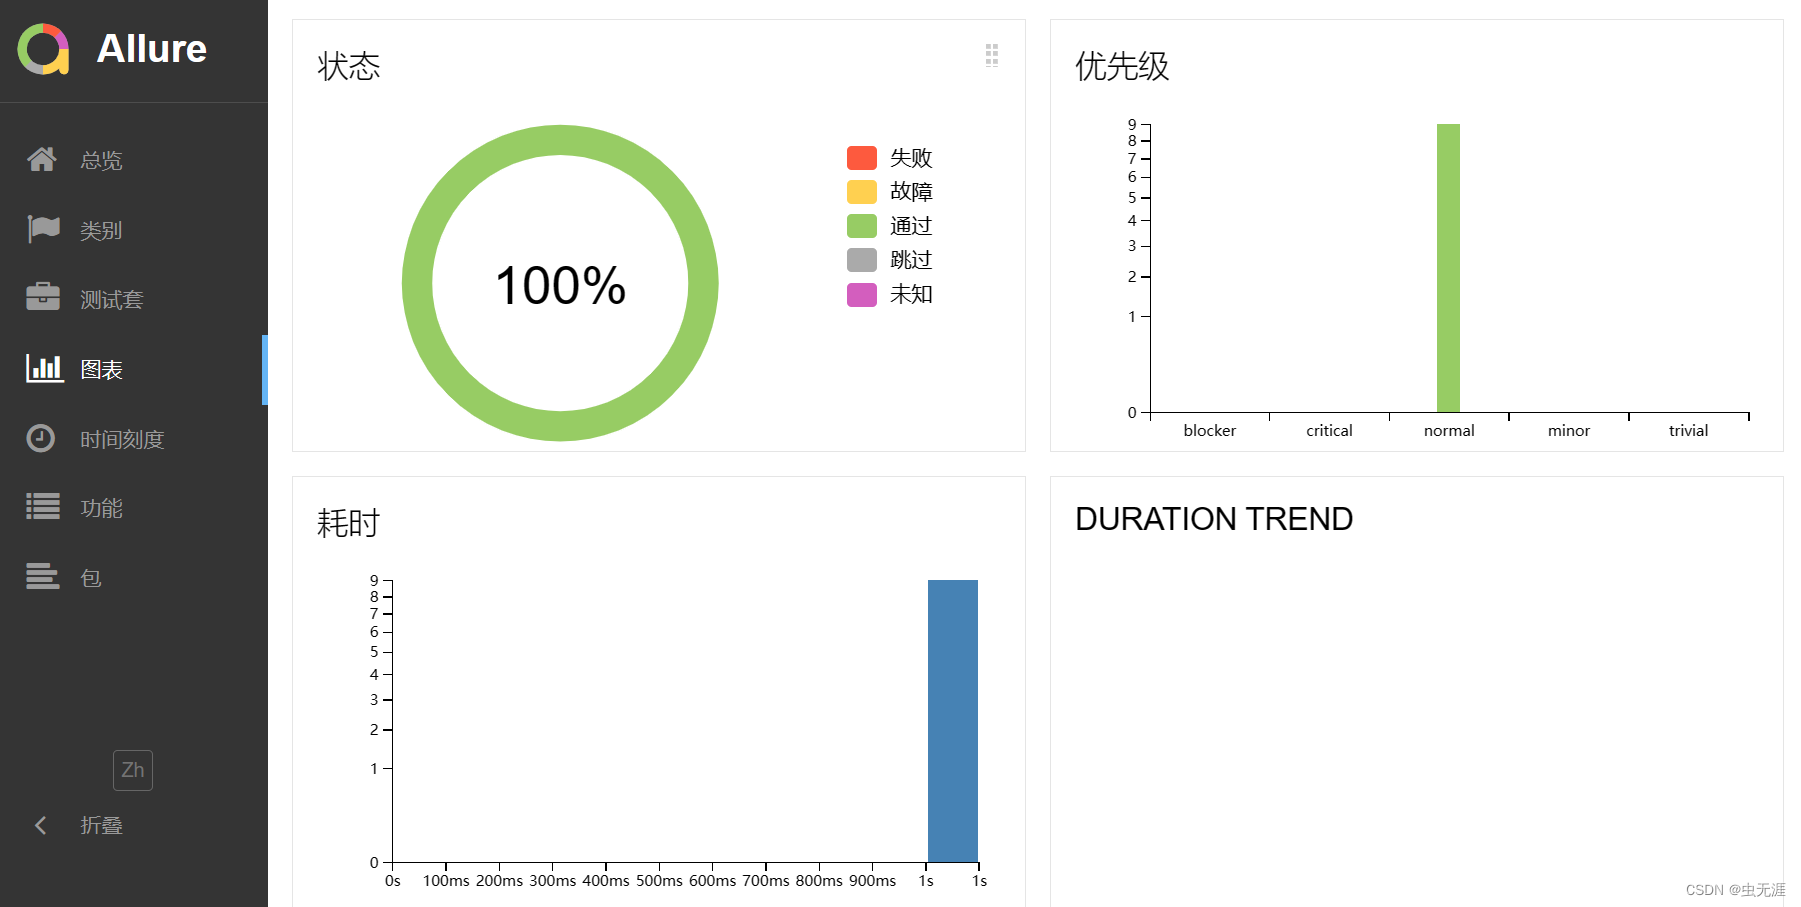
- 查看运行图标数据:
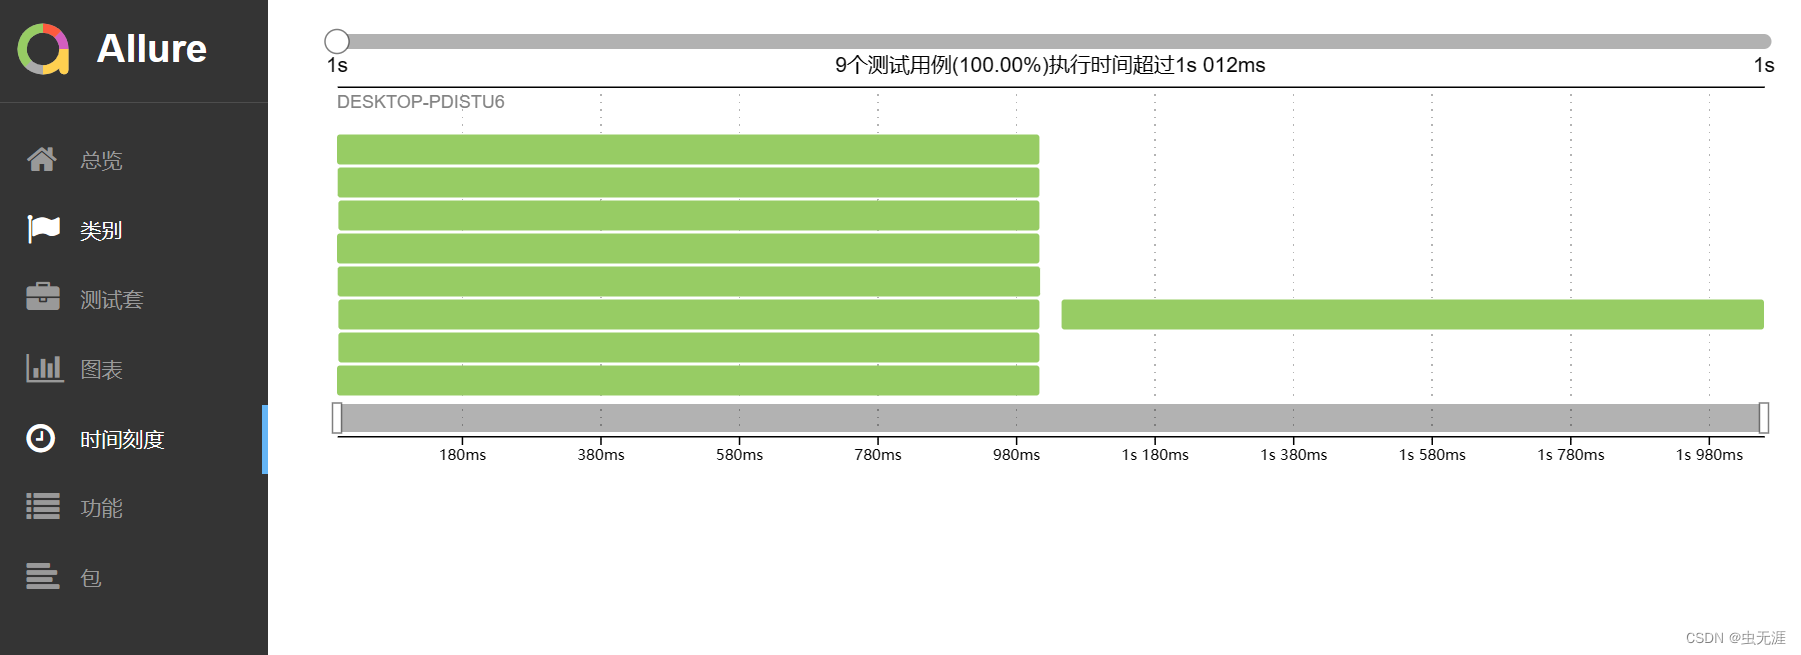
- 查看用例执行时间:
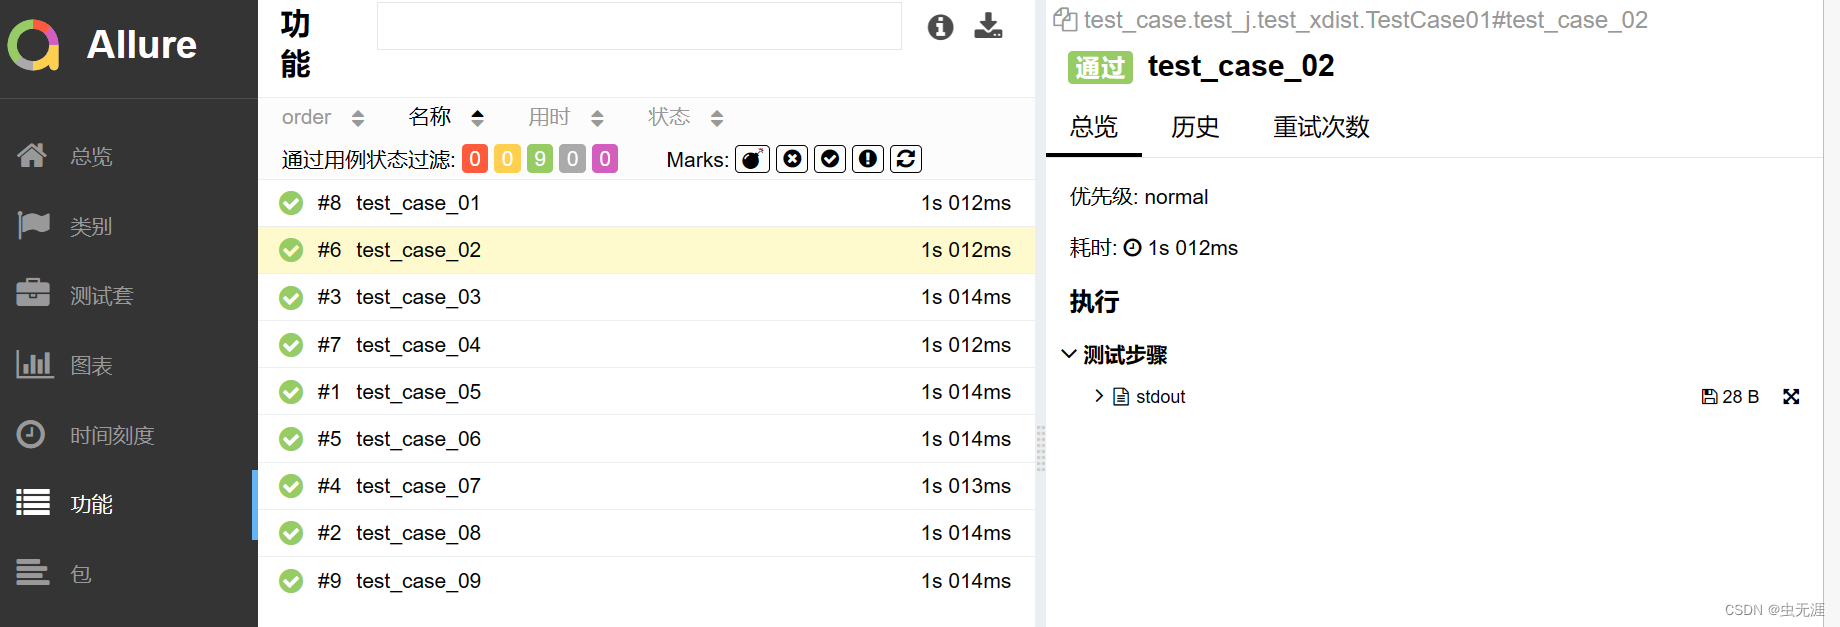
- 查看用例数据:


5 allure报告结构说明


| 字段 | 说明 |
|---|---|
Overview |
报告总览 |
Categories |
类别,查看用例执行情况比如 failed和error |
Suites |
测试套件,根据package、module、类、方法来查找用例 |
Graphs |
测试结果图形 ,有分布图,优先级,耗时等 |
Timeline |
用例运行时间等 |
Behaviors |
行为驱动, 根据epic、feature、story来分组测试用例 |
Packages |
按照package、module来分组测试用例 |